
You turn on the little drinking water faucet, and instead of a clean steady stream, you get a weak trickle. Or the water still flows, but the taste is different. Maybe a little flat, maybe a little off, maybe just enough that you stop and wonder whether the system is still doing its job.
That's the moment most homeowners start searching for answers. Not because they want to become reverse osmosis experts, but because they want their water back to normal.
Under-sink RO systems are reliable when they're maintained, but they don't stay sharp on neglect. Sediment loads up. Carbon cartridges lose capacity. Membranes get stressed when upstream filters aren't changed on time or when local water conditions are rougher than the generic instructions assume. Around Central Florida, that matters. Hardness, iron, sediment, and mixed water conditions can change how an RO system behaves long before the calendar says it should.
This guide is written for the homeowner standing at the sink right now, trying to decide whether this is a simple reverse osmosis filter replacement or a sign of a bigger problem. If you're not sure what's in your water, or if the system has never seemed quite right, start with a look at reverse osmosis water treatment options and consider scheduling a no-obligation water check through the contact page before you buy parts you may not need.
Table of Contents
- Is Your RO System Ready for a Refresh
- Signs Its Time for a Reverse Osmosis Filter Replacement
- Gathering Your Tools and the Right Replacement Filters
- How to Change Your RO Filters A Step-by-Step Walkthrough
- DIY or Call a Pro When to Contact Florida Water Management
- Your RO Filter Questions Answered
Is Your RO System Ready for a Refresh
A lot of filter changes start the same way. The faucet slows down over a few weeks, so slowly that nobody notices at first. Then one morning the tank takes forever to refill, or the water has a taste that wasn't there last month, and suddenly the system gets your full attention.
What changes first in a real home
In the field, the first complaint usually isn't technical. It's practical. “The water doesn't taste right.” “The ice tastes funny.” “It used to fill a bottle fast, now it crawls.” Those are useful clues.
Filters don't fail all at once. They load up gradually. Sediment cartridges catch particles until flow drops. Carbon cartridges lose their ability to improve taste and odor. If those stages aren't doing their job, the membrane downstream works harder than it should.
Practical rule: If your RO water has changed in taste, flow, or clarity, treat that as a maintenance signal, not something to ignore for another month.
Why a simple filter change often fixes it
For many under-sink systems, a routine cartridge change brings the system back to life. Clean housings, fresh pre-filters, proper reassembly, and a full flush solve the problem more often than homeowners expect.
But not every system issue is a filter issue. Older landlord-installed units, mixed-brand setups, and private-well homes can have overlapping problems. A membrane may be fouled. A storage tank may be underperforming. A cartridge may have been replaced with the wrong size at some point.
That's why it helps to start calmly and diagnose what the system is telling you. If you're unsure whether the water itself has changed, a free water test is often the smartest first move before ordering parts.
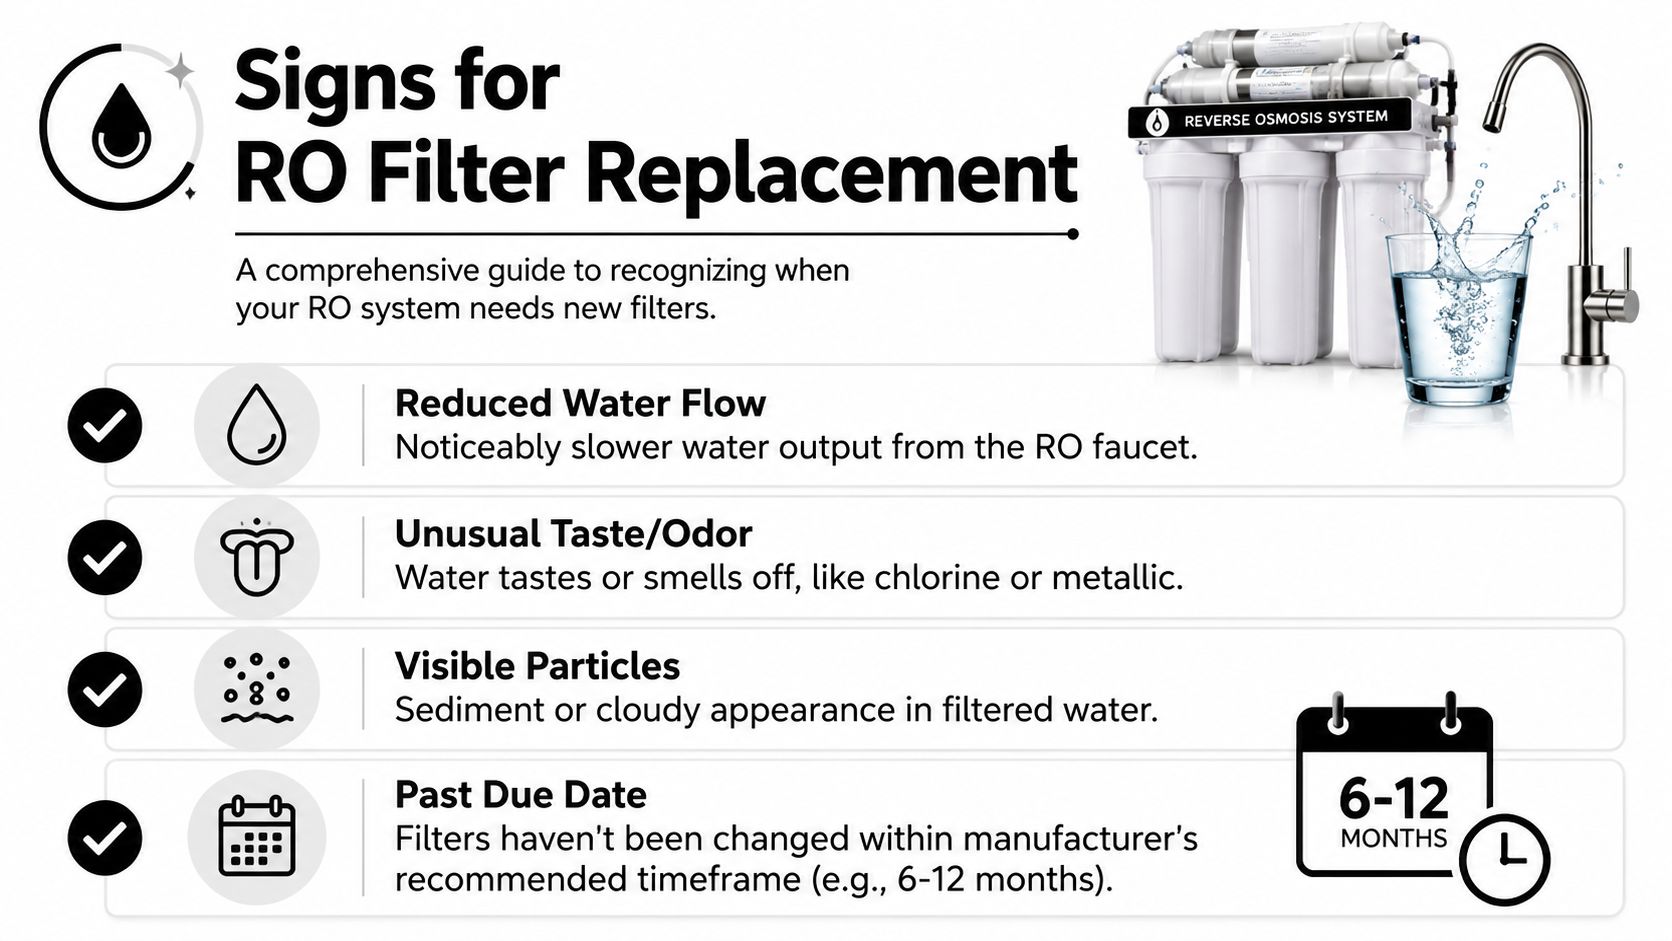
Signs Its Time for a Reverse Osmosis Filter Replacement
A common under-sink call goes like this. The water still comes out, but the glass fills slower than it used to. Coffee tastes flat. Ice picks up an odor. In a real home, those changes matter more than a date written on a filter housing.
What your faucet is telling you
Start with performance, not the calendar.
- Reduced flow at the RO faucet: This often points to a sediment or carbon pre-filter that is loading up. It can also mean a weak storage tank, low feed pressure, or a membrane that is no longer producing well.
- Taste or odor changes: Carbon stages are usually the first place I look when homeowners describe stale, chemical, musty, or metallic-tasting RO water.
- Cloudy water that does not clear: A little cloudiness right after service can be trapped air. Persistent haze or visible particles deserve a closer check.
- Longer tank refill time: If the system takes much longer to recover after a few glasses of water, the membrane or pre-filters may be restricting production.
- Leaks or housing problems after past filter changes: Drips do not always mean the cartridge is overdue. They can also point to a pinched O-ring, a cracked sump, or the wrong replacement part.
In Central Florida, replacement timing varies more than generic guides suggest. City water, well water, seasonal changes, iron, hardness, and sediment all affect how long cartridges last. Two neighbors can own the same RO unit and still need service on very different timelines.
Use the schedule as a baseline, not the only trigger
There is still a standard maintenance pattern. Pre-filters such as sediment and carbon cartridges are commonly replaced every 6 to 12 months, while the RO membrane typically lasts 2 to 3 years, according to this reverse osmosis maintenance overview citing EPA WaterSense criteria.
That baseline helps prevent neglect, but it does not solve the main homeowner problem. Many systems under Florida sinks are mixed-brand setups, older units with faded labels, or landlord-installed systems with unknown cartridge history. In those cases, performance clues matter more than trying to force the system into a generic schedule.
A practical rule works better. If flow drops, taste changes, or refill time stretches out, inspect the system and confirm which cartridges are installed before ordering parts. If you are dealing with an unmarked setup or want help identifying cartridge types, sizes, and compatible replacements, water filtration system service options can save a lot of trial and error.
Quick signs by component
| Filter Component | Common Replacement Pattern | What Usually Shows Up First |
|---|---|---|
| Sediment pre-filter | About every 6 to 12 months | Slower flow, pressure drop, visible dirt loading in high-sediment homes |
| Carbon pre-filter | About every 6 to 12 months | Off taste, odor changes, chlorine breakthrough on city water |
| RO membrane | Often around 2 to 3 years | Slow production, poor taste improvement, weak overall system output |
When a filter change may not be enough
Some symptoms point past a routine cartridge swap.
If the faucet is slow even with fresh pre-filters, the tank may be undercharged or failing. If the water still tastes bad after the filters were changed correctly, the membrane may be fouled, the cartridges may be installed in the wrong order, or the replacement parts may not match the unit. On private wells, untreated iron or heavy sediment ahead of the RO can shorten filter life fast.
That is the point where professional help makes sense. It is especially true if the system has no clear model information, keeps leaking after service, or shows the same performance problems right after a filter change.
Gathering Your Tools and the Right Replacement Filters
A clean filter change starts before you ever loosen a housing. Most problems happen because the homeowner is halfway into the job before realizing the new cartridges don't match the old ones, or the system under the sink doesn't have a clear brand label anywhere.
What to set out before you start
For a standard under-sink reverse osmosis filter replacement, gather these first:
- Filter housing wrench: Use the wrench that fits your housing size. Trying to muscle a canister loose by hand often ends with a stuck sump or a cracked housing.
- Bucket and towels: Water always comes out, even when you've shut the valves correctly.
- Clean cloth or paper towels: You'll need them to wipe housings, threads, and O-ring grooves.
- Food-grade silicone grease: A light film on a healthy O-ring helps it seat cleanly and reduces drip issues after reassembly.
- Phone camera: This is one of the most useful tools in the whole job. Photograph every stage before you remove anything.
If you're still sorting out what kind of system you have, water filtration system service options can help narrow down whether you're dealing with a standard under-sink setup or something more customized.
How to identify unknown cartridges
Many generic guides leave people stranded. They assume you already know the brand, model, cartridge order, and membrane rating. In real homes, that often isn't true.
A major challenge for homeowners is identifying the correct replacement filter for unlabeled systems. Success often requires measuring fittings, matching thread or quick-connect styles, and confirming membrane gallons-per-day ratings, as systems vary widely in design and efficiency.
Use this checklist before ordering parts:
- Photograph every label: Check the membrane housing, cartridge wrappers, inline filters, and any sticker on the manifold or tank.
- Measure the old parts: Length and diameter matter. Close enough is usually not good enough under a sink.
- Check connection style: Inline filters may use quick-connect fittings, while other parts may thread into housings or adapters.
- Find flow direction marks: Some inline cartridges have arrows. Installing them backward creates instant performance problems.
- Look for membrane rating: If the membrane has a gallons-per-day marking, record it exactly before ordering.
If the system has mixed brands, faded labels, or odd-size cartridges, stop before buying “universal” replacements. Unknown systems are where ordering mistakes usually happen.
Know when a filter is proprietary
Some systems use standard cartridges. Others use housings or fittings that look standard until you remove them. If a cartridge has unusual end caps, molded connectors, or a shape that doesn't resemble common under-sink replacements, treat it as potentially proprietary until proven otherwise.
That extra caution saves time, return shipping, and frustration.
How to Change Your RO Filters A Step-by-Step Walkthrough
The safest way to handle reverse osmosis filter replacement is to think in phases. Don't rush. Don't pull everything apart at once. Work clean, keep the old parts in order, and verify each stage as you go.
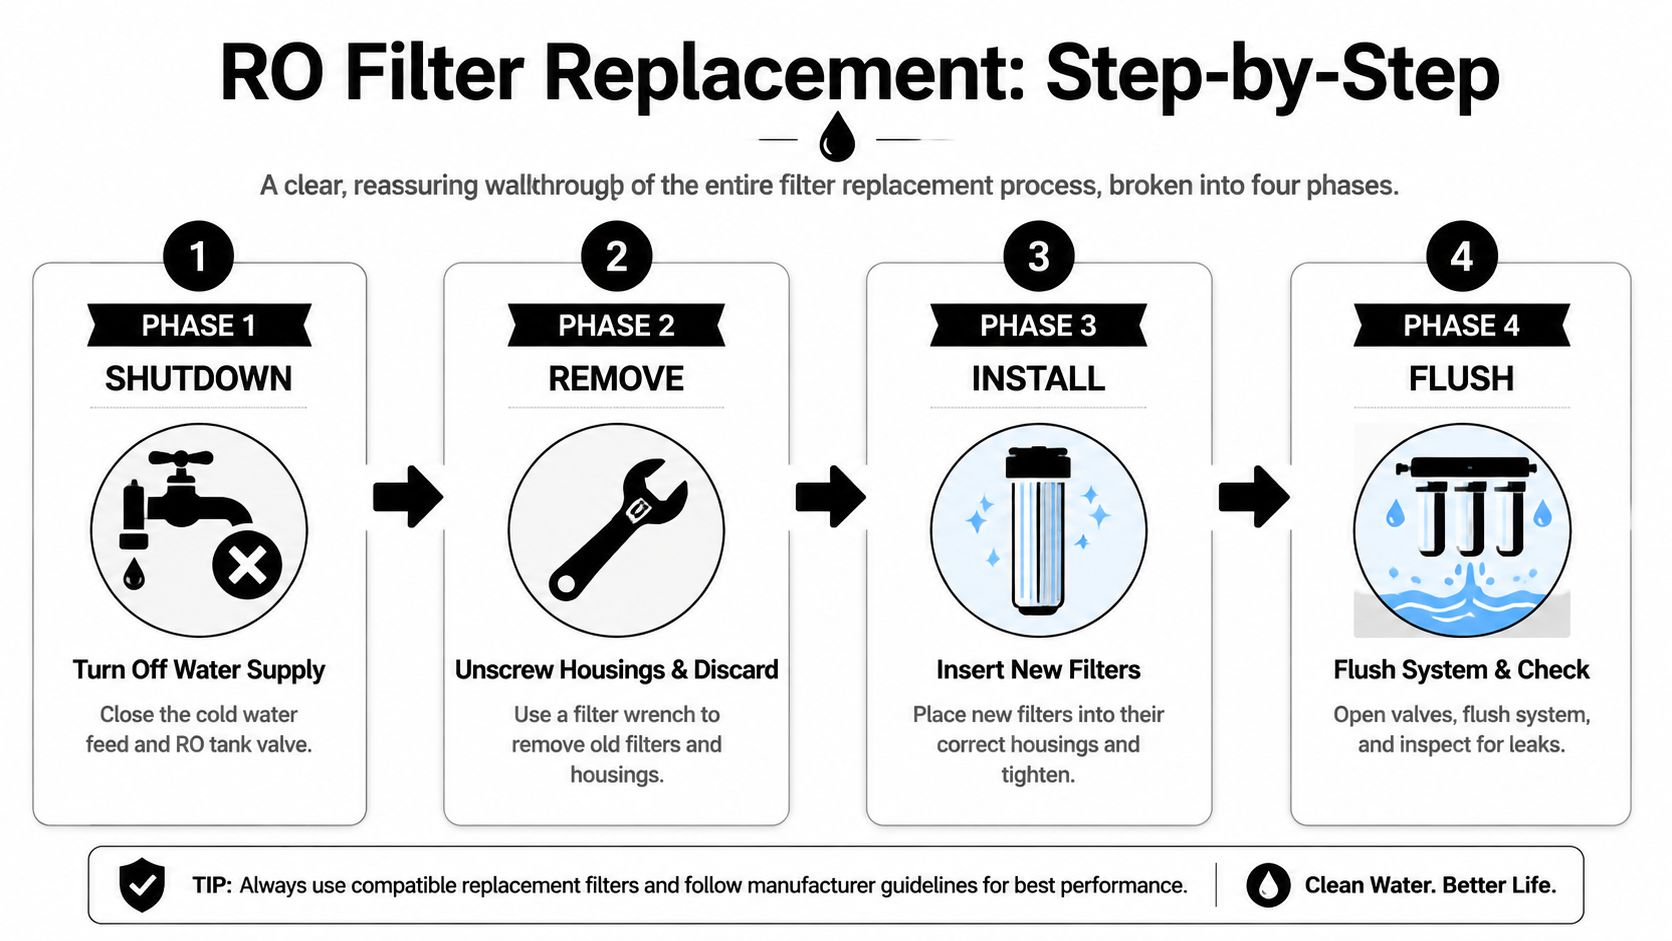
Phase one shut down and depressurize
Start by closing the feed valve that supplies the RO unit and the tank valve on the storage tank. Then open the RO faucet and let it run until pressure drops off.
This matters more than most homeowners realize. A pressurized system fights you during disassembly. Depressurizing first makes the job cleaner and reduces the chance of splashing, sudden drips, and cross-threading when you reinstall parts.
Put towels under the system and set a small bucket in the cabinet. Even a careful change usually releases some water from housings and lines.
Phase two replace the pre-filters
Most under-sink systems have sediment and carbon pre-filters in vertical housings. Use the housing wrench to loosen each sump. Turn steadily. If a housing is stuck, support the bracket with one hand so you're not twisting the whole assembly.
Once the housing is off:
- Remove the old cartridge.
- Empty the housing.
- Clean the inside thoroughly.
- Inspect the O-ring for cracks, flattening, or debris.
- Lubricate the O-ring lightly with food-grade silicone grease if it's in good shape.
- Install the new cartridge in the correct position.
- Thread the housing back on evenly.
Keep the cartridges in order on the counter as they come out. If you have multiple stages and they look similar, this avoids mixing them up during reassembly.
A mis-seated O-ring causes more post-replacement leaks than a loose housing. Clean the groove, seat the O-ring flat, and tighten evenly.
Phase three replace the membrane if needed
The membrane lives in its own housing, usually a horizontal tube. This part is trickier than the pre-filter change because membranes fit tightly and different systems secure the housing cap in different ways.
Open the membrane housing carefully. Pull the old membrane straight out. Sometimes it takes a firm grip and a slow pull because it has sealed itself in place over time.
Before installing the new membrane:
- Confirm the rating: Match the replacement membrane to the original gallons-per-day specification.
- Check end orientation: Membranes have a correct insertion direction.
- Seat it fully: If it isn't pushed in completely, the system can bypass or perform poorly.
This is the phase where unlabeled or mixed-brand systems often become confusing. If the old membrane has no readable markings and the replacement isn't an exact physical match, don't force it.
Phase four restart flush and inspect
Once the new cartridges and membrane are in place, reopen the feed supply and tank valve. Bring the system back online slowly and watch every housing, fitting, and tube connection as pressure returns.
The correct replacement workflow involves shutting off feed and tank valves, depressurizing the system, changing filters, then flushing the tank completely and repeating the drain and refill cycle at least twice before consumption, based on reverse osmosis installation instructions that specify “2 more complete batches” after the initial flush.
That flushing step isn't optional. It helps clear:
- Trapped air that can make the water look cloudy
- Carbon fines from new filters
- Residual sanitizing solution if the system was cleaned during service
After the first full tank is produced, drain it completely. Then let it refill and drain again. Repeat until the system has completed that full flushing sequence before anyone drinks the water.
What works and what does not
A few habits make this job go smoothly:
- What works: Taking photos before disassembly, changing one stage at a time, cleaning housings well, and flushing patiently.
- What doesn't: Guessing filter order, overtightening housings, skipping the flush, or assuming any cartridge that “sort of fits” is acceptable.
- What saves cabinet floors: Watching for leaks for several minutes after repressurizing, then checking again later the same day.
If the system keeps leaking after a careful O-ring inspection, or if the taste and production are still off after a proper flush, that's usually the point to stop troubleshooting alone.
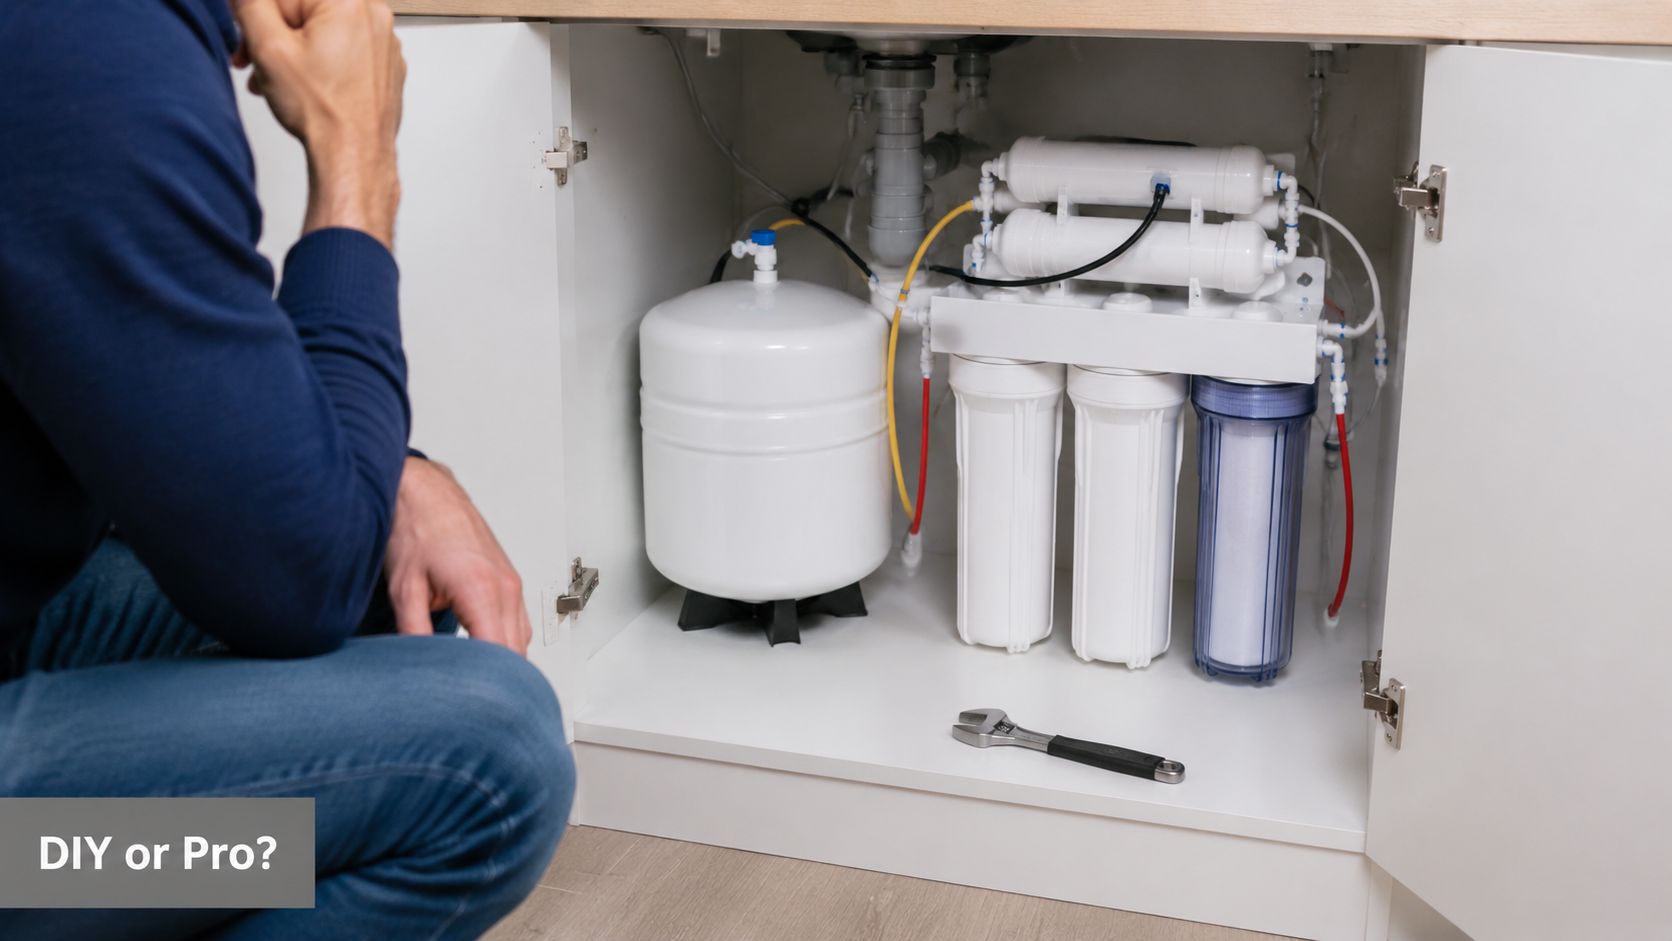
DIY or Call a Pro When to Contact Florida Water Management
A standard under-sink filter change is well within reach for many homeowners. If the system is clearly labeled, the housings open cleanly, and you're replacing like-for-like parts, DIY makes sense.
The decision changes when the job stops being a simple swap and turns into diagnosis.
Good DIY jobs
You can usually handle the work yourself when the situation looks like this:
- Known system and known parts: You have the model information, or the replacement set matches the existing cartridges exactly.
- Routine symptoms: Slow flow, overdue filters, or taste changes that line up with ordinary maintenance.
- No prior damage: The bracket is solid, housings aren't cracked, fittings aren't brittle, and there's no sign of old chronic leaks.
- Straightforward reassembly: The system restarts, flushes properly, and stays dry after pressure returns.
For these jobs, the main investment is care and patience.
Problems that usually need service
A professional visit makes more sense when you run into any of these:
- Persistent leaks after reassembly: That can mean a damaged O-ring, cracked housing, warped sealing surface, or a connection issue that isn't obvious at first glance.
- Unknown cartridges or mixed-brand parts: One wrong membrane or inline connection can waste a lot of time.
- Bad taste after a correct flush: If the water still tastes wrong after proper replacement and flushing, the issue may be source-water related or tied to another treatment stage.
- Well water complications: Homes on private wells often deal with iron, sediment, sulfur, or microbial concerns that affect filter life and system behavior.
- Performance problems beyond the filters: Slow production can involve the tank, feed pressure, membrane condition, or overall system design.
Professional maintenance also has a cost context homeowners should understand. DIY replacement filter sets typically cost $40 to $90 per year, while professional annual RO maintenance can range from $175 to $600, and membrane replacement may add about $30 to $100 every 2 to 5 years, based on Angi's reverse osmosis cost guide. That higher service cost covers more than parts. It often includes diagnosis, sanitization, and performance verification.
Paying for service isn't admitting defeat. It's often the cheaper decision when the real problem isn't the cartridge in your hand.
If you want a technician to evaluate the system, review the water conditions, or handle the replacement and testing, Florida Water Management service options are available for homeowners and small businesses in Central Florida.
Your RO Filter Questions Answered
What should I do with the old filters
Most used RO cartridges go out with normal household waste unless the manufacturer gives a specific disposal program. Let them drain first so you don't drop a soaked filter into the trash. If you're on a well or dealing with unusual contaminants, ask your service company whether any local disposal guidance applies to your setup.
Why is the water cloudy or why do I see black specks
Right after a filter change, that's often air or carbon fines. A cloudy first draw and a few black specks can happen when fresh carbon media sheds small particles during startup. That's one reason the post-installation flush matters so much. If cloudiness continues after the full flush sequence, or keeps coming back days later, the system needs a closer inspection.
Why is the flow still slow after I changed the filters
If you changed the cartridges correctly and the flow still hasn't recovered, don't assume the new filters are bad. The storage tank may not be performing properly, the membrane may be restricted, or the system may have another bottleneck such as feed pressure or a connection issue. This is especially common with older systems that have gone too long between maintenance visits.
A slow faucet after replacement is a clue. It means the cartridges were only part of the story.
If your RO water still tastes off, the faucet is still slow, or you're not sure which replacement parts fit your system, contact Florida Water Management for a free water test and a practical system review. A quick look at the water and the equipment can save you from buying the wrong filters, missing a membrane problem, or chasing the same issue again in a few months.