

You walk out to the garage because the shower felt slick in the wrong way, the dishes have spots again, and the softener is acting like it's working when it clearly isn't. That's a common Central Florida call. The tricky part is that a water softener can fail in two very different ways. Sometimes a part is clogged, stuck, or worn out. Other times the machine is fine, but the water is so loaded with iron, sediment, sulfur-related contamination, or plain old hardness that the softener can't keep up.
That difference matters. If you try to repair a water softener that's being overwhelmed by your water chemistry, you can waste a weekend cleaning parts and still end up with hard water Monday morning. The most useful approach is to start simple, rule out the easy stuff, then decide whether you're dealing with a real mechanical issue or a water-quality problem.
Table of Contents
- First-Pass Diagnostics You Can Do in 15 Minutes
- How to Defeat Salt Bridges and Brine Tank Problems
- Troubleshooting Your Softener's Control Valve
- Is It Broken or Overwhelmed by Florida Water
- Repair or Replace A Smart Homeowner's Decision Guide
- Your Next Steps for Crystal-Clear Water in Central Florida
First-Pass Diagnostics You Can Do in 15 Minutes
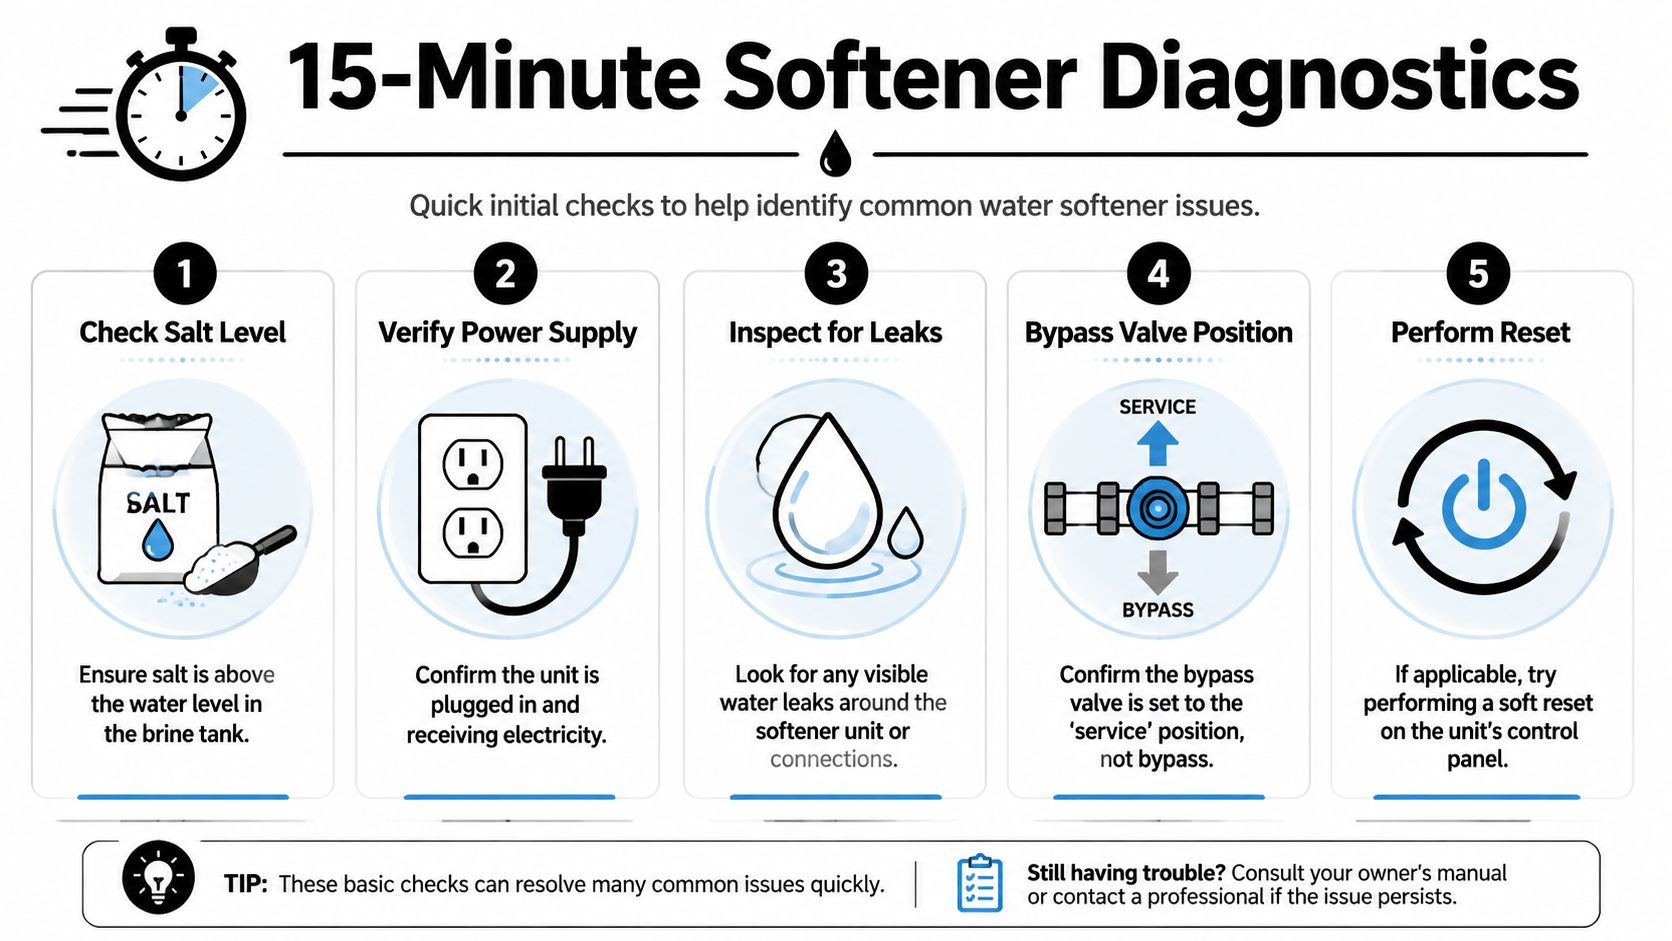
Most “dead” softeners aren't dead. They're unplugged, bypassed, low on salt, or showing a control issue that started after a power interruption. Before you grab pliers, do the fast checks first.
Start with what the unit needs to operate
A softener has to have power, water flow through the valve head, and enough salt to make brine. If any one of those is missing, the whole system can look broken.
- Check the outlet first. Make sure the transformer is plugged in firmly and the outlet is live. In garages and utility rooms, a tripped GFCI is common.
- Look at the display. If the time is wrong or the screen is blank, the softener may have lost its schedule after a power event.
- Open the brine tank. Don't just glance at the lid. Look inside and confirm there's usable salt, not just a crust on top.
Confirm the bypass valve isn't the problem
I see this one all the time after plumbing work. Someone puts the unit in bypass, leaves it there, and the softener gets blamed for hard water.
The bypass should be in service, not bypass. If your house suddenly has harder water but pressure seems normal, that valve deserves a close look. On many units, the handle position tells you immediately. On others, you need to check the label on the valve body.
Practical rule: If the softener has power but the house still feels like untreated water, check the bypass before you assume any internal failure.
Look for a simple leak or overflow clue
Walk around the base of the system and inspect the plumbing connections, drain line, and the floor nearby. You're not doing a full tear-down yet. You're looking for clues.
A few things stand out right away:
| Check | What it can mean |
|---|---|
| Water around the brine tank | Float issue, drain problem, or overfill condition |
| Damp fittings at the valve head | Loose connection or seal issue |
| Kinked tubing | Restricted brine draw or poor regeneration |
| No visible issues but hard water continues | Possible internal clog, programming issue, or water chemistry overload |
If you're trying to understand normal softener operation before going deeper, it helps to review how a whole-home water softening system works.
Try a soft reset and manual cycle
Some control heads let you do a soft reset or start a manual regeneration from the front panel. If your screen is responsive, use the owner's instructions on the faceplate or inside the cover. Don't start changing hidden programming values unless you know what they control.
If the unit begins a manual regeneration and sounds normal, that's useful information. It suggests the motor and control are at least partially alive. If nothing happens, or the cycle starts and stalls, you're moving beyond the no-tool stage.
How to Defeat Salt Bridges and Brine Tank Problems
A brine tank can fool you. I see it in Central Florida all the time. The tank looks half full of salt, the softener has power, and the homeowner assumes a major breakdown. Then you probe the salt bed and find a hard crust on top or a sludge layer at the bottom, and the unit never had a fair chance to make proper brine.
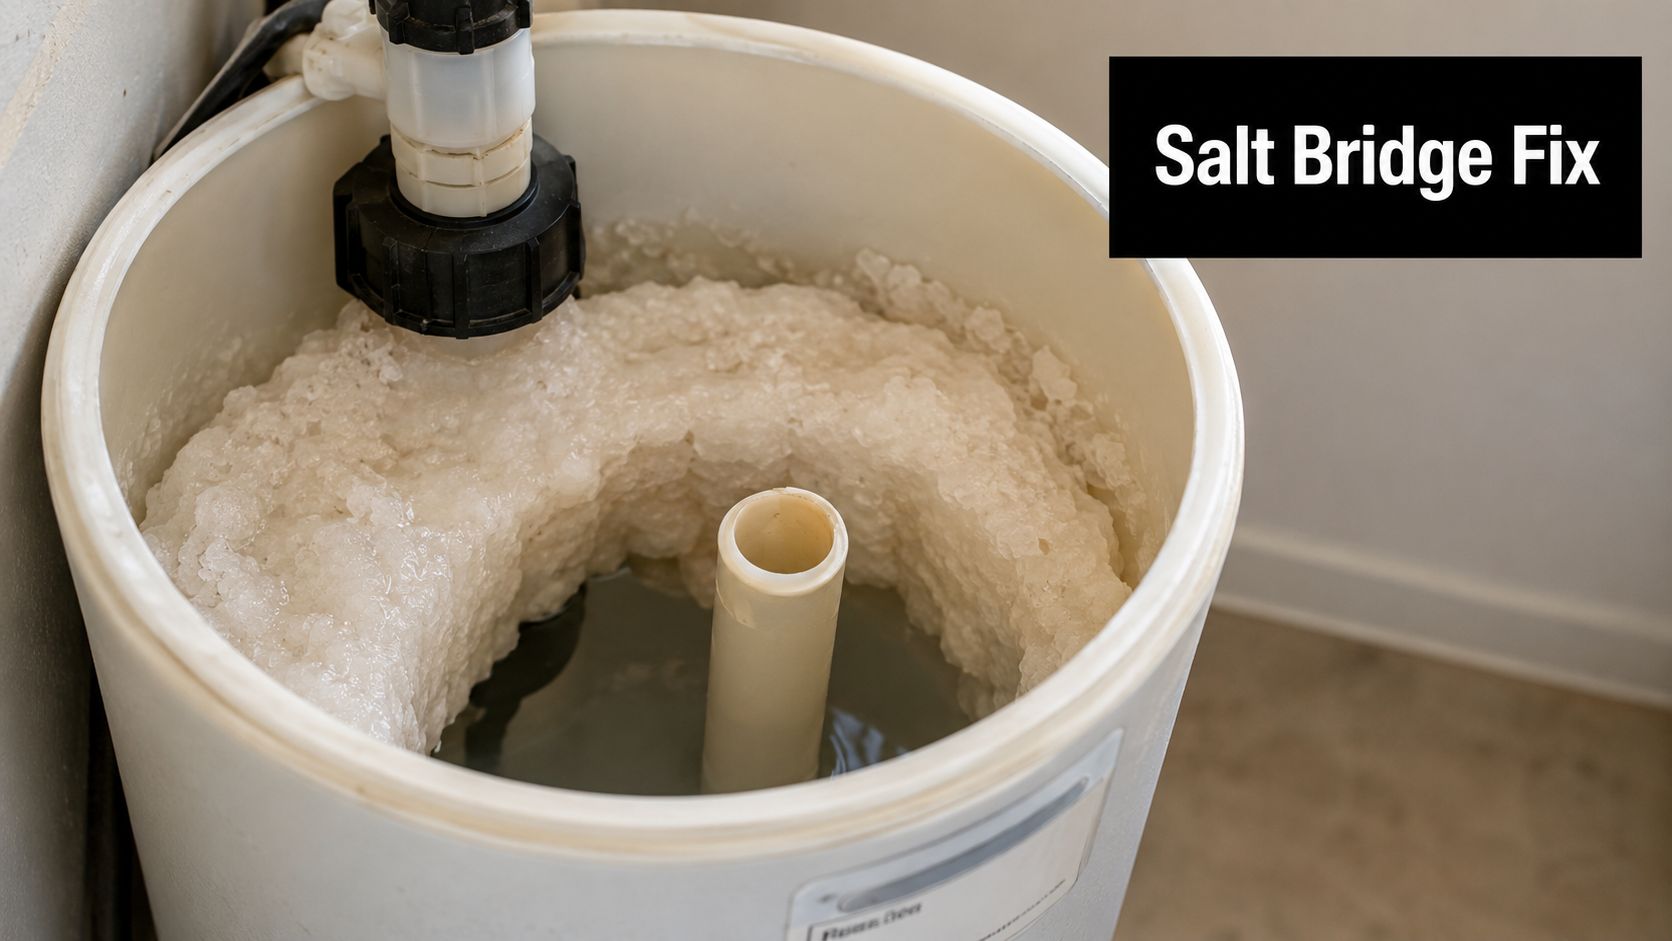
Brine tank trouble is common because the tank sits at the point where salt quality, humidity, iron, sulfur, and hard water all show up together. A general maintenance guide from Just Plumbing Arizona notes that salt mush and sediment are frequent causes of softener problems. That matches field experience here, especially on well systems with iron or on city water that runs very hard.
Before you start pulling parts apart, ask one question. Is the softener failing mechanically, or is your water chemistry overwhelming the brine system? If the salt is clumping, the tank smells off, or you see orange-brown residue, test the raw water. High iron can make a healthy softener act broken.
Salt bridge versus salt mush
These are different problems, and they call for slightly different fixes.
A salt bridge is a hard crust, usually higher in the tank, with empty space or loose salt underneath. The tank looks full, but the water below cannot dissolve enough salt to make strong brine.
Salt mush sits lower. It forms a heavy, wet sludge near the bottom that can block brine formation and interfere with the float assembly.
Use a broom handle or mop handle and check the tank slowly.
- Push straight down through the salt bed. A sudden stop near the top suggests a bridge.
- Feel for a hollow drop below the crust. That confirms the bridge is suspended.
- Probe the bottom of the tank. Thick, wet resistance points to mush.
- Watch the color and smell. Rust staining or a rotten-egg odor often means iron or sulfur is part of the problem, not just bad salt storage.
Break a bridge gently. The tank wall, brine well, and float parts are easy to damage if you stab at it.
Clean the tank the way a tech would
If the tank has mush, a quick stir usually does not solve it. Clean it out fully so you know the float, brine well, and salt bed are starting from a known condition.
- Put the softener in bypass if your setup requires it for safe service.
- Scoop or vacuum out the salt and standing water. A wet/dry vacuum saves a lot of time.
- Wash the inside of the tank. Warm water, mild dish soap, and a long brush are enough for most buildup.
- Inspect the brine well and safety float. They should move freely without grit or crust holding them up.
- Check the bottom for iron sludge or debris. That is your clue that the water itself may be loading the system too hard.
- Reassemble carefully. Make sure the float is straight and the tubing is seated correctly.
For iron fouling, one practical cleaning method is to add one cup of iron-out remover mixed with half a gallon of cold water into the brine well after removing the cap, then run a manual regeneration. That approach can help when the tank shows orange staining and iron odor.
Refill it correctly or the same problem returns
Overfilled tanks bridge more often. Leave about 6 inches of space from the top so the salt can settle and break apart normally.
A few habits make a real difference:
- Use one salt type consistently. Switching between pellets, crystals, and lower-grade salt can increase clumping.
- Keep the lid closed tight. Florida garage humidity gets into everything.
- Do not top off the tank every time you walk by. It is better to keep a moderate level than to pack it high.
- Pay attention to recurring sludge. If mush keeps returning after a proper cleaning, test for iron and hardness before assuming another part has failed.
That last point matters. In Central Florida, repeated brine tank problems often point to water conditions the softener was not sized or configured to handle. Cleaning the tank fixes the symptom. A water test tells you whether you are dealing with the cause.
Troubleshooting Your Softener's Control Valve
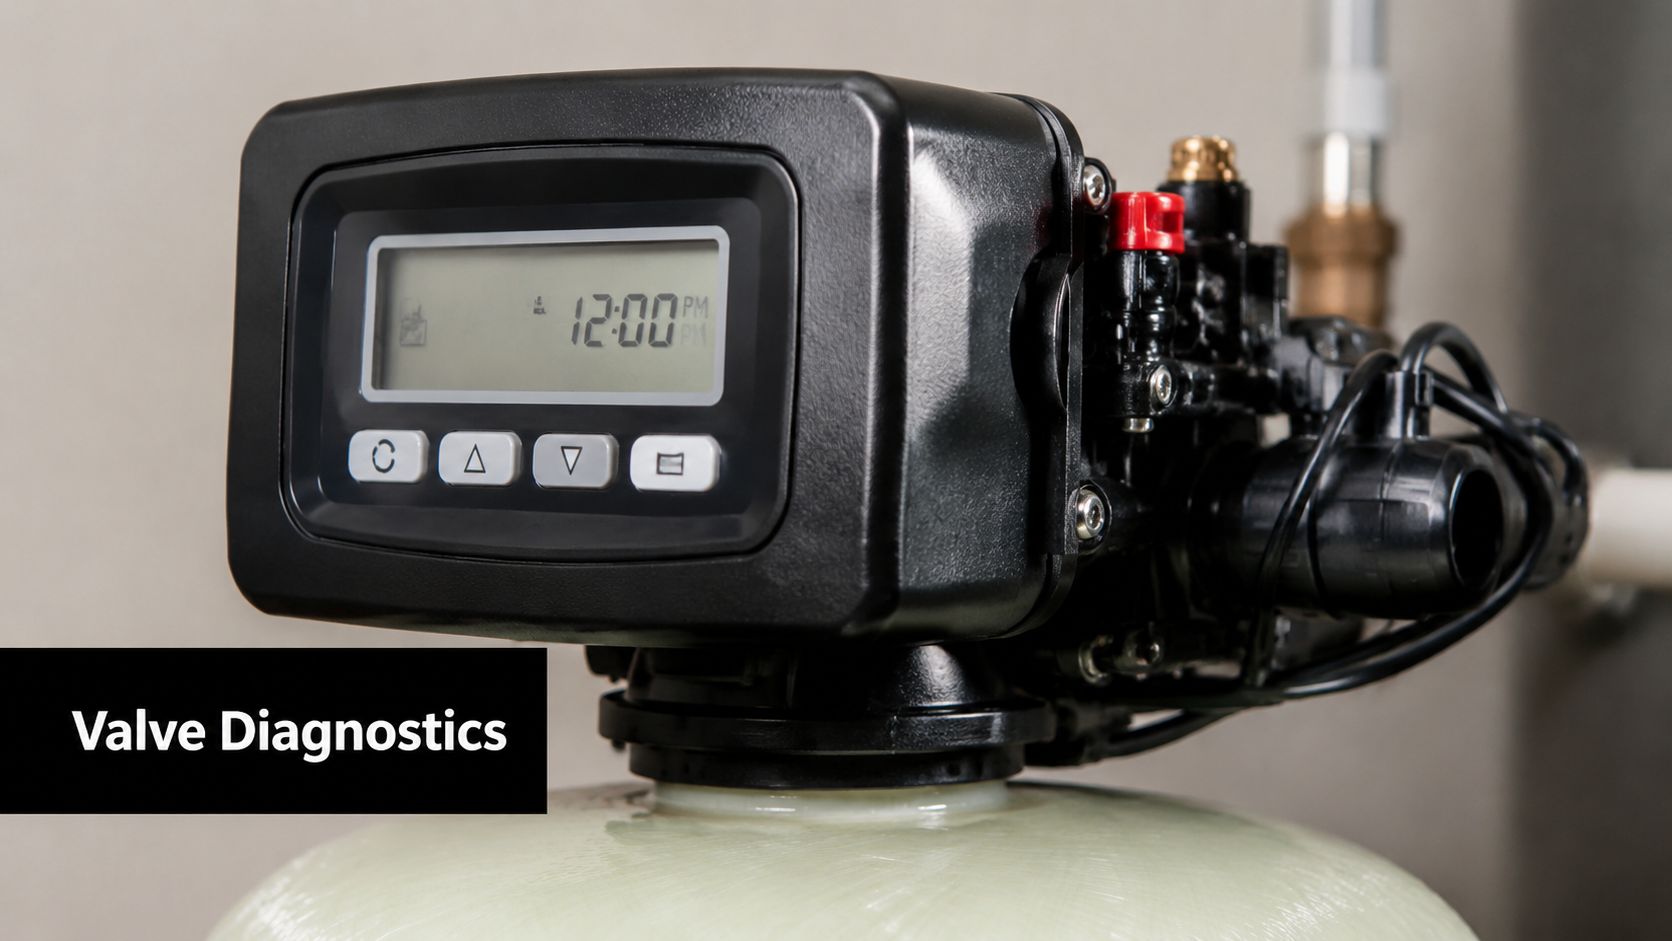
When the brine tank looks good but the system still isn't using salt properly, the problem often moves up into the control valve. That's the part that directs water through service, backwash, brine draw, and rinse. If it can't pull brine, the softener won't regenerate the resin the way it should.
Focus on the injector and brine line first
Inside many valve heads is an injector assembly with a small nozzle and screen. Those tiny passages don't tolerate sediment or iron very well. If they clog, the unit may run through a cycle without drawing brine from the tank.
Check these areas in order:
- Brine line tubing. Look for kinks, cracks, or loose fittings that can pull air instead of brine.
- Injector housing. Remove it carefully and keep parts in order on a towel.
- Injector screen and nozzle. Rinse and clean gently. A soft brush works better than forcing debris through with a sharp tool.
This is small-parts work. Good lighting helps. So does taking a photo before disassembly so you know exactly how it goes back together.
What a successful test looks like
After cleaning the injector and confirming the brine line is open, run a manual regeneration. Watch and listen.
You want to see signs that the system is moving through the cycle normally. On many units, you'll hear changes in flow and notice the brine section behaving differently than before. If the tank level doesn't respond over time, or the unit stalls on one stage, the issue may be deeper than a clogged screen.
If a softener starts a cycle but never seems to complete it properly, don't keep forcing regenerations back to back. Repeated cycling won't fix a stuck motor, worn seals, or a control board problem.
Where DIY usually stops
Some control-valve issues are still homeowner-friendly. Cleaning the injector, inspecting tubing, and checking for simple obstructions are fair game if you're patient and organized.
Other faults are better left alone:
| Symptom | Likely direction |
|---|---|
| Motor hums but valve doesn't advance | Internal drive or motor problem |
| Valve leaks internally between stages | Seal or spacer wear |
| Display behaves erratically | Control board or power issue |
| Repeats odd cycle behavior after cleaning | Professional diagnosis needed |
At this point, the job shifts from basic maintenance to component repair. Once you're opening the head further or dealing with motors and internal seals, a wrong move can create a leak, a programming issue, or a unit that won't return to service.
If you've cleaned the injector, checked the line, and confirmed the basics, but soft water still isn't coming back, don't assume the remaining issue is mechanical. In Central Florida, the water itself is often the next clue.
Is It Broken or Overwhelmed by Florida Water
A lot of repair guides stop at salt, screens, and valves. In Central Florida, that's not enough. Water from private wells can carry iron, sediment, sulfur-related issues, and hardness levels that make a softener work much harder than the average homeowner realizes.
That creates a bad diagnosis cycle. The homeowner searches “repair water softener,” sees the usual advice, cleans a few parts, and still has orange staining, hardness scale, or poor soap lather. The machine gets blamed again. But the underlying problem may be the incoming water.
Signs the water is beating up the system
A softener that's overwhelmed doesn't always look broken. It may still cycle, still use some salt, and still have a live display. But treatment performance slips because the resin bed or internal passages are fouled.
Watch for these patterns:
- Orange or rusty staining returns quickly. Iron may be loading the system faster than it can recover.
- Sediment shows up in aerators or fixtures. Debris can foul valves and media.
- Soft water quality fades early between regenerations. The unit may be losing effective capacity.
- Well water smells or changes seasonally. Water chemistry shifts can expose weaknesses in the treatment setup.
A commonly missed angle in repair content is exactly this: a “broken” softener may be overwhelmed by water chemistry. Iron fouling and resin-bed contamination from well water can reduce performance and require resin cleaning or different pretreatment, not just a part replacement, as noted in this discussion of water chemistry versus mechanical failure.
Why a water test should come before major repairs
If you live around Sebring, Avon Park, Lake Wales, Winter Haven, or Frostproof, a proper water test saves guesswork. It tells you whether you're dealing with hardness alone or a combination problem that includes iron, sediment, sulfur, or something else affecting the softener.
That matters because the fix changes:
- A clogged injector calls for cleaning.
- Fouled resin may need specialized cleaning or media evaluation.
- Heavy sediment may call for prefiltration ahead of the softener.
- Iron-heavy water may need treatment upstream so the softener isn't carrying the entire load.
This is the point where a lot of homeowners spend money in the wrong direction. They replace a valve part when the actual issue is untreated well water hitting the system day after day.
Test the incoming water before buying major softener parts. If the chemistry is wrong, even a correct repair may not hold.
If you want a clear answer instead of a parts-guessing exercise, schedule a free water test through the contact page. That gives you a starting point based on what's in your water, not just what the softener is doing on the surface.
Repair or Replace A Smart Homeowner's Decision Guide
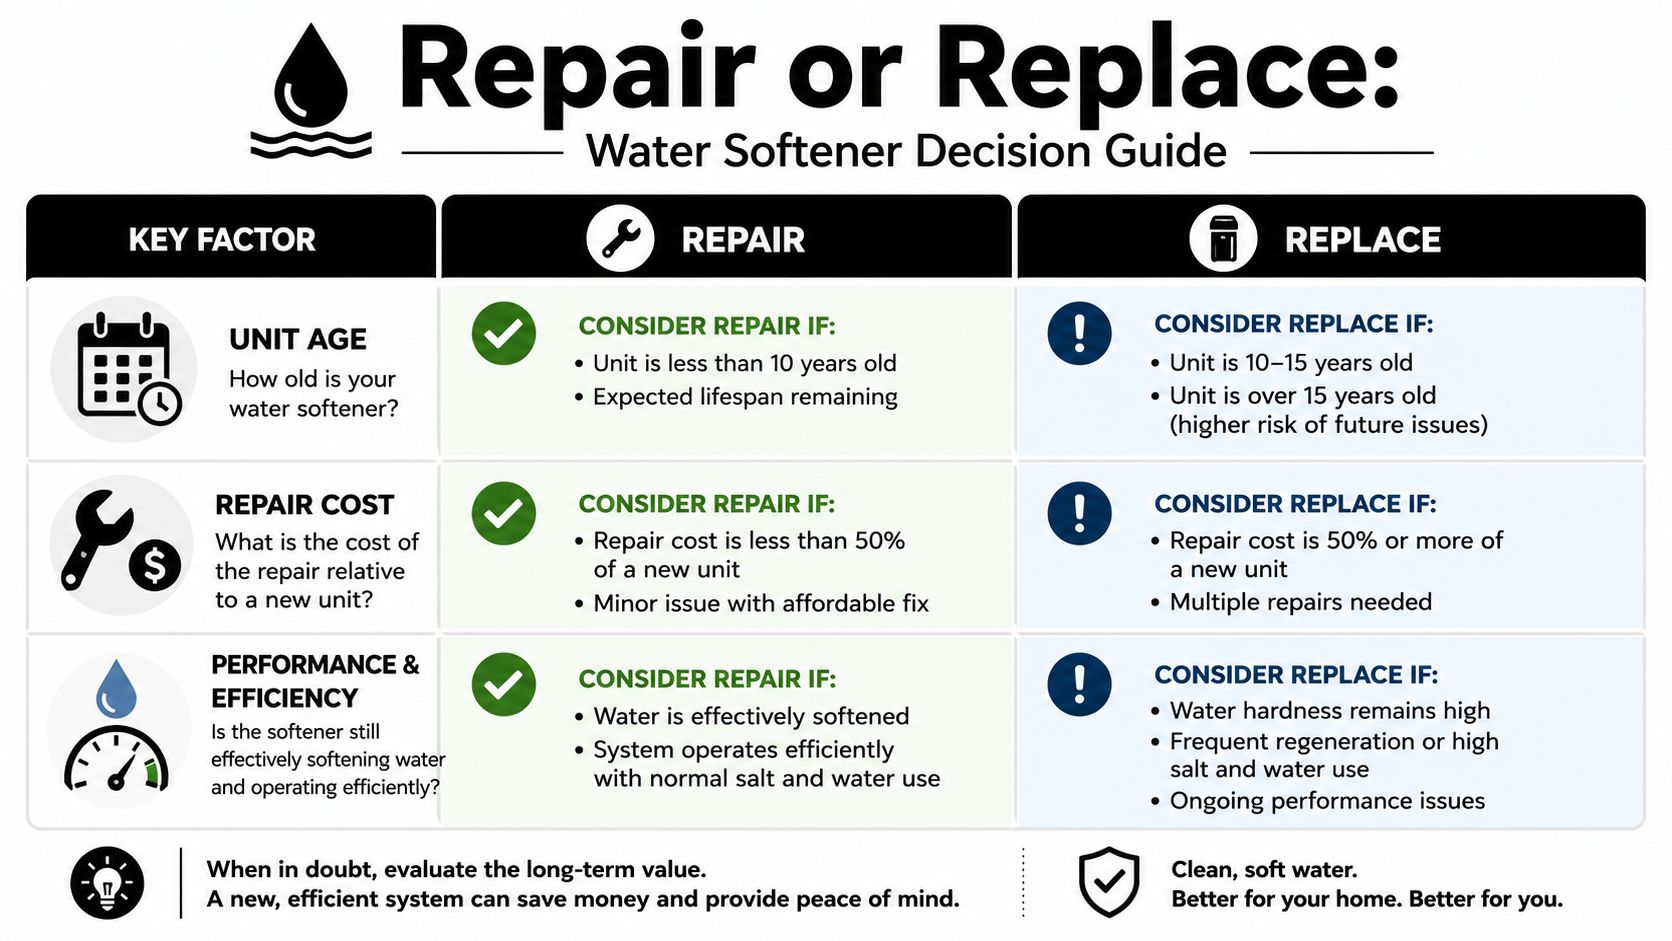
At some point, repairing a water softener stops being practical and starts becoming expensive hesitation. The right call usually comes down to age, repair cost, and how reliably the unit still performs.
The U.S. Department of Energy says most water softeners last 10–15 years, and for the average four-person home it recommends sizing a softener at about 33,000 grains per gallon, while noting that hard water is generally considered above 7.5 GPG, in its guide to purchasing and maintaining a water softener. That service-life window matters because a repair on a newer unit is different from a repair on a softener already near the back end of its life.
Look at the dollars without kidding yourself
Repair pricing varies a lot. Angi reports that most water softener repair jobs fall between $162 and $977, with an average repair cost starting at $553 and rising to $2,500+ in more complex cases. The same source says simple filter replacements can start at $25, while full system replacement can reach $6,000. You can review those repair and replacement ranges in Angi's breakdown of water softener repair costs.
That spread tells you something important. A small fix can be worth doing. A large repair on an older unit can put you halfway into replacement money without solving efficiency, capacity, or outdated controls.
Use this decision filter
Ask three questions and answer them truthfully.
| Factor | Repair usually makes sense when | Replace usually makes sense when |
|---|---|---|
| Unit age | The system is still in the earlier part of its service life | The unit is near or beyond the typical service window |
| Cost of the current fix | The issue is minor and isolated | The estimate is high or one of several recent service costs |
| Performance after service | Water quality returns and stays stable | Problems keep returning or the unit no longer keeps up |
The softener that costs you twice
Some systems still “run,” but they're poor candidates for more repair. That usually includes units with repeated regeneration trouble, aging timer-style controls, or long-term resin exhaustion. In those cases, you're not deciding whether the machine can turn on. You're deciding whether it can deliver reliable treatment without another service call soon after.
If you need a replacement path, especially for a house with persistent hardness or a rental that needs dependable uptime, review local water softener installation options in Lake Wales.
An old softener with recurring problems is rarely cheap to own, even if each repair seems manageable by itself.
Your Next Steps for Crystal-Clear Water in Central Florida
A lot of Central Florida softeners get called "broken" when they are really getting buried by the water they are trying to treat. I see it all the time with iron, sulfur, and hardness levels that changed enough to push an older system past its working range. Before you spend money on parts or another service call, get the water tested and confirm what changed.
If the quick checks fixed the issue, keep the system on a simple schedule. Check salt before the tank runs low, break up crusting early, and look inside the brine tank instead of trusting the salt level from the top. After storms or power outages, verify the time and regeneration settings because controls do get knocked off.
If the problem returned after basic cleaning, the next step is diagnosis, not guessing. A unit can have a worn seal pack, a fouled resin bed, an injector restriction, or perfectly functional mechanics that are losing the fight against raw water conditions. Those are different problems, and they do not respond to the same repair.
A short maintenance checklist that actually helps
- Watch salt condition, not just salt height. A tank can look full and still fail to make proper brine.
- Pay attention to staining and odor changes. Around here, orange staining or sulfur smell often points to water chemistry shifts, not just a bad softener part.
- Check around the unit for leaks or drain trouble. Small problems stay small when you catch them early.
- Notice how the water acts in daily use. Soap lather, laundry feel, fixture scale, and spotting usually reveal trouble before the display does.
When expert service is the sensible move
Call for service when you need someone to separate a true mechanical failure from a water-quality problem. That is the point where a free water test earns its keep. It shows whether the softener needs a repair, whether the resin has been fouled by iron, or whether the house needs pretreatment ahead of the softener to handle sulfur, sediment, or heavy mineral load.
If your house also needs treatment beyond softening, such as sediment, sulfur, or drinking-water improvement, it helps to look at broader water filtration system options in Sebring. A broader review of recurring softener trouble and replacement economics appears in this article on overflowing softeners and economical replacement decisions.
Florida Water Management helps homeowners and small businesses across Central Florida diagnose hard water, iron, sulfur, sediment, and softener performance problems with in-home testing and system service. If you worked through these steps and want a professional to confirm whether the issue is mechanical or water-related, request a free water test through Florida Water Management.