
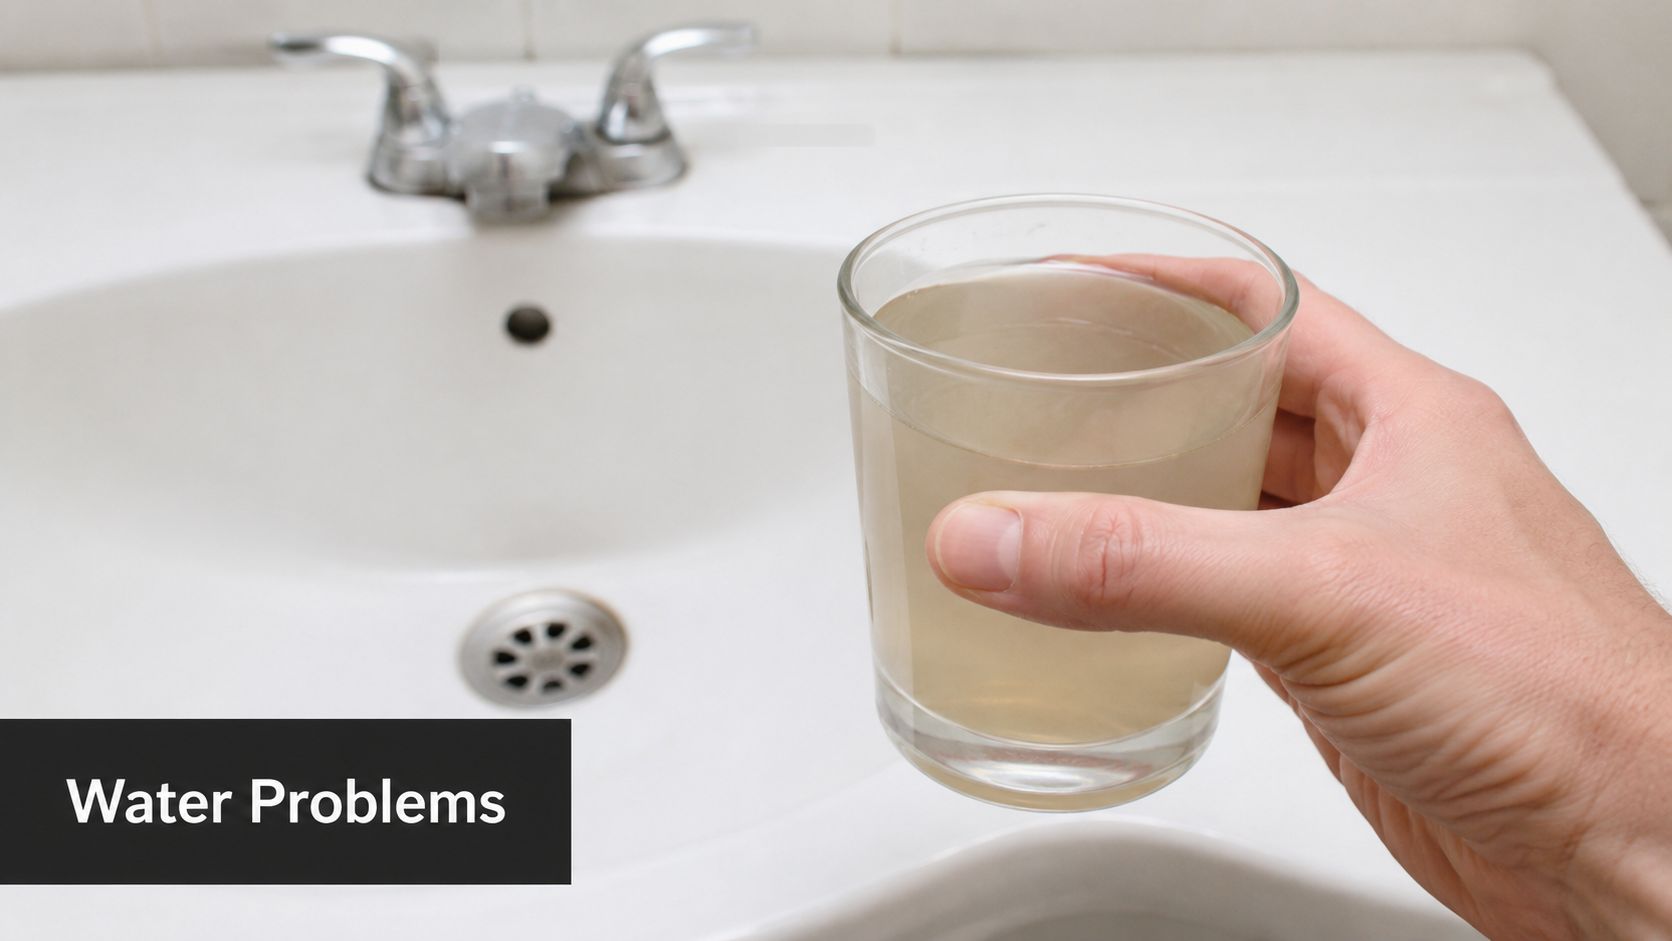
You notice it in small ways first. The shower doesn't hit quite as hard. The water has a faint sulfur smell again. A white crust starts showing back up on fixtures, or the sink picks up a light orange tint that wasn't there a few months ago.
That usually doesn't mean your system failed. In Central Florida, it usually means your system has been doing its job against hard water, iron, sulfur, sediment, or chlorine, and now it needs attention.
That's the mindset shift most homeowners need. A whole-house system isn't a refrigerator you plug in and forget. It's a treatment system that works against whatever your local water brings into the house. In Sebring, Lake Wales, Frostproof, and other nearby areas, that can mean changing well conditions, seasonal sediment, or mineral-heavy water that loads up filters faster than a generic schedule would suggest.
The smartest place to start isn't guessing. It's knowing what your water looks like right now. If you're trying to figure out whether your current setup is matched to your water, review whole-home filtration options in Sebring and schedule a free water test through the contact page before you spend money on the wrong maintenance or the wrong cartridges.
Table of Contents
- Your Guide to Clean Water in Central Florida
- A Realistic Maintenance Calendar for Your System
- How to Change Filter Cartridges and Sanitize Housings
- Troubleshooting Common Florida Water Problems
- DIY Maintenance vs Calling a Professional
- Protecting Your Investment and Your Health
Your Guide to Clean Water in Central Florida
A homeowner in Highlands County will often call after the same pattern. The system was installed, the water improved, everyone relaxed, and then months later a smell, stain, or pressure change started creeping back in. They assume the equipment is wearing out. Most of the time, the underlying issue is simpler. The system needs routine whole house water filter maintenance based on its water conditions.
Central Florida water is rarely one-note. A home on city water may be focused on chlorine taste and odor. A home on a private well might deal with iron, sulfur, hardness, sand, or fine sediment. Some houses have all of it at once. That's why one neighbor can go longer between cartridge changes while another is swapping pre-filters much more often.
Practical rule: Maintenance schedules make sense only after you know what the incoming water is carrying and what each stage of the system is supposed to remove.
A good maintenance plan starts with the raw water, not the calendar on your phone. If the well starts pulling more sediment after heavy weather, the sediment stage may load up early. If sulfur odor returns but pressure still seems normal, the problem may not be a clogged cartridge at all. If hardness scale returns on glass and fixtures, you may be looking at a softener issue instead of a filter issue.
Three things matter most at the start:
- Know your water source: City water and well water don't load systems the same way.
- Know your equipment: A cartridge system, softener, iron filter, and RO unit all have different service needs.
- Watch for changes: Pressure, odor, taste, and staining are operating clues, not annoyances to ignore.
Homeowners save themselves a lot of frustration when they stop treating maintenance like a fixed chore and start treating it like system management. The free water test is the right first move because it tells you whether the system still matches the house, the source, and the actual water you're using every day.
A Realistic Maintenance Calendar for Your System
Most maintenance advice online is too generic to be useful in Florida. It gives one replacement date and assumes every house has the same water. That isn't how these systems behave in the field.
A better schedule uses both the component type and the water conditions feeding it. The intervals below are grounded in common replacement guidance, but they still need to be adjusted to your water quality and how your system performs in your home.

Why schedules vary from house to house
A maintenance guide for home systems says sediment and carbon filters are often replaced every 3 to 6 months, and in high-sediment conditions as often as 1 to 3 months. The same guide says reverse osmosis pre- and post-filters commonly need replacement every 6 to 12 months, while RO membranes typically last 2 to 3 years according to this home water filtration maintenance guide.
That lines up with what Central Florida homeowners see. Well water homes often burn through sediment stages faster because the pre-filter is catching the load before it reaches carbon, media tanks, softener valves, and fixtures. A city water home may not fight sand or iron the same way, but it can still need regular cartridge service to keep chlorine and taste issues under control.
Whole-House Filter Maintenance Schedule At a Glance
| Component | Typical Interval (City Water) | Typical Interval (Well Water) | Key Indicator for Change |
|---|---|---|---|
| Sediment pre-filter | 3 to 6 months | 1 to 3 months in high-sediment conditions, otherwise often 3 to 6 months | Pressure drop, slower fixtures, visibly loaded cartridge |
| Carbon filter | 3 to 6 months | 3 to 6 months | Return of taste or odor, reduced performance |
| Iron or sulfur treatment media tank | Condition-based | Condition-based | Odor or staining returns, backwash or valve issues |
| Water softener | Condition-based | Condition-based | Hardness signs return, soap doesn't lather well, scaling shows up |
| Reverse osmosis pre- and post-filters | 6 to 12 months | 6 to 12 months | Taste change, reduced production, system alerts if equipped |
| RO membrane | 2 to 3 years | 2 to 3 years | Declining drinking water quality or reduced membrane performance |
What each part of the system is telling you
Sediment pre-filters are the sacrificial stage. They protect everything downstream. In well-water homes around Frostproof, Lake Wales, and rural properties outside town, this is often the first maintenance item to come due. If pressure starts falling at multiple fixtures, don't assume the plumbing is the problem. Check the first filter.
Carbon stages are different. They don't always look bad when they're spent. A cartridge can appear fairly normal but still stop handling chlorine taste, odor, or sulfur-related aesthetics the way it did when it was fresh. That's why smell and taste matter as operating signals.
If a filter only gets changed when it looks dirty, homeowners often miss the point where performance has already dropped.
Iron and sulfur systems usually need a more diagnostic approach than a calendar reminder. When orange staining returns or rotten-egg odor comes back, the answer may be media exhaustion, poor backwashing, injector fouling, or a control issue. The fix depends on the equipment design and the current water.
Water softeners don't follow the same cartridge schedule because they aren't cartridge devices. Instead, you watch the symptoms. Scale on fixtures, rough-feeling laundry, spotting on dishes, and poor soap performance all tell you the softening side may need service, adjustment, or inspection.
For homes with drinking water treatment under the sink, reverse osmosis service and support should be planned separately from the whole-house schedule. The RO unit protects consumption water at one tap, while the whole-house equipment handles the rest of the house.
How to Change Filter Cartridges and Sanitize Housings
Changing a cartridge isn't difficult, but sloppy technique causes most of the leaks and callback problems homeowners run into. The housing, O-ring, and pressure in the line matter just as much as the new filter.
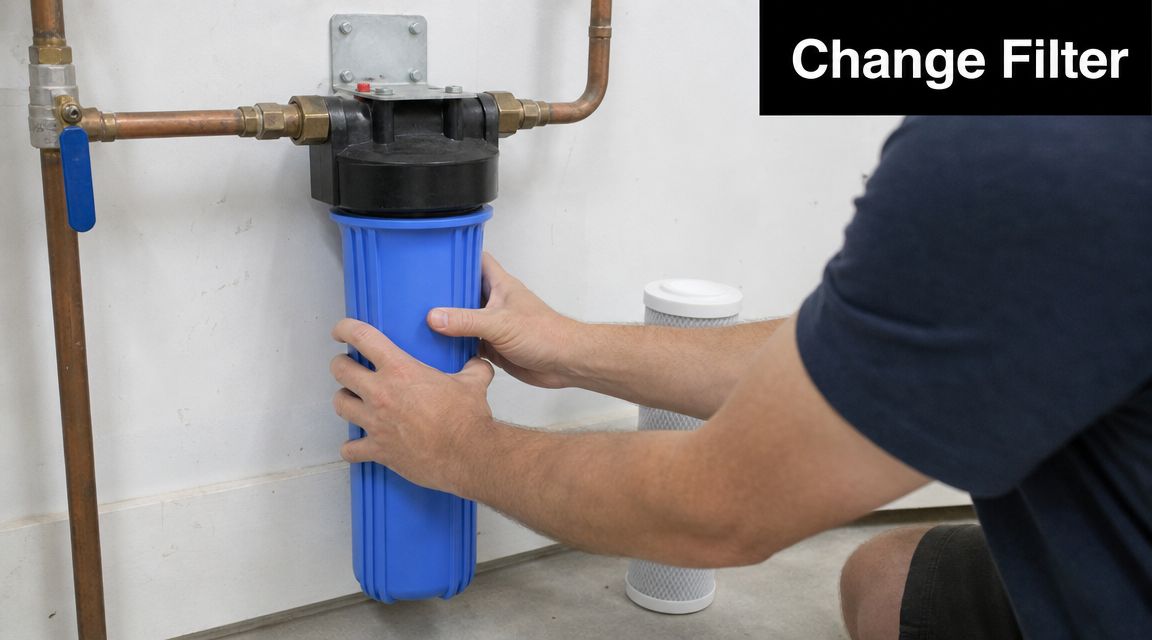
The service routine that prevents messes and leaks
One practical benchmark for servicing a whole-house cartridge system is a 3-step service cycle. Shut off the main supply, relieve pressure at a downstream faucet, and then service the filter. A technical maintenance guide also notes that a pressure loss greater than 10 psi is a sign the filter or regulator needs attention, and flushing for 5 to 10 minutes after reassembly is recommended according to this whole-house maintenance reference.
In the field, a clean cartridge change usually looks like this:
- Shut off the feed water before you touch the housing.
- Open a downstream faucet to relieve pressure. Skip this and the housing often fights you the whole way.
- Use the correct filter wrench to loosen the sump. Don't force it with pliers.
- Remove the old cartridge and inspect the inside of the housing for slime, grit, rust staining, or mineral film.
- Wash and sanitize the housing before the new cartridge goes in.
- Inspect the O-ring carefully, then lubricate and reseat it correctly.
- Reassemble without over-tightening.
- Turn water back on slowly and watch for leaks.
- Flush the system before using the water for normal household needs.
Sanitizing matters because a neglected housing can become part of the problem. If the system removes chlorine or another disinfectant upstream, you don't want stagnant residue sitting inside the sump between changes.
The mistakes that cause callbacks
The most common leak after a DIY cartridge change isn't a cracked housing. It's a bad O-ring install. If the O-ring is twisted, dry, dirty, pinched, or not fully seated in its groove, the housing may drip right away or leak only after pressure builds.
Other problems show up just as often:
- Over-tightening the sump: This can distort the seal or damage the housing threads.
- Skipping housing cleaning: Sediment and film left inside contaminate the new cartridge environment.
- Installing in a rush: Cross-threading starts easily when the sump isn't aligned squarely.
- Not flushing after service: Carbon dust and fines need to clear before the water is used.
A cartridge change should feel controlled. If you're forcing parts, something is off.
DIY works well when you're changing standard cartridges and everything comes apart cleanly. If the housing is seized, the bracket is flexing, the sump is cracked, or the leak won't stop after reseating the O-ring, that's when the job stops being a simple filter swap and starts becoming a repair.
Troubleshooting Common Florida Water Problems
Maintenance isn't just replacement. It's diagnosis. The best homeowners I deal with don't just say, "The system isn't working." They tell me what changed first. Pressure. Smell. Stains. Cloudiness. That narrows the problem fast.
When pressure drops
A whole-house system that suddenly feels weak at multiple fixtures often points upstream. Start with the sediment stage. A loaded pre-filter is a common cause, especially on a private well or any system dealing with sand, silt, or iron particulate.
If pressure is low only at one faucet or one shower, look closer to that fixture. The whole-house system may be fine, and the aerator or showerhead may have caught debris after a recent filter change or plumbing disturbance.
Check in this order:
- Whole house or one fixture: If the problem is everywhere, inspect the system first.
- Recent filter change: A poor seal, wrong cartridge, or trapped debris can affect flow.
- Pre-filter condition: This is often the first restriction point in Florida well homes.
- Softener or control valve behavior: If the pre-filter looks fine, the issue may be farther downstream in treatment equipment.
When smell or staining comes back
Odor and staining tell a different story. A rotten-egg smell can point to sulfur-related treatment losing effectiveness. Orange or brown staining suggests iron control may be slipping. White crust and spotting usually point back toward hardness.
These clues matter because each symptom maps to a different part of the system. Replacing a carbon cartridge won't fix a softener that's no longer delivering softened water. Changing a sediment filter won't solve an iron filter that isn't cycling properly.
For households on wells, well water treatment support becomes important when symptoms return in patterns. Seasonal shifts, pump behavior, sediment bursts, and changing raw water conditions can all change what the equipment has to handle.
Why condition-based maintenance works better
NSF notes that filter choice and replacement depend on actual water quality results and the specific contaminants being targeted, not a universal schedule. It also highlights the gap that opens when homeowners rely only on time-based replacement and miss breakthrough, which is why monitoring taste, odor, and testing matters alongside pressure according to NSF guidance on home water treatment.
That's the key idea behind condition-based maintenance. The calendar tells you when to look. The water tells you what to do.
A practical diagnostic habit is to keep a simple record of cartridge changes, pressure behavior, odor changes, and visible staining. You don't need a lab notebook. A note on the phone works. Over time, patterns show up. Maybe the sediment cartridge loads faster during part of the year. Maybe sulfur odor comes back before pressure changes. Maybe hardness symptoms return long before anything looks wrong at the filter housing.
That kind of observation prevents both common mistakes. Replacing parts too early and missing a performance problem because the schedule said you still had time.
DIY Maintenance vs Calling a Professional
Some maintenance jobs are homeowner-friendly. Others can turn into water damage, broken housings, or a misdiagnosed treatment problem if you push too far.
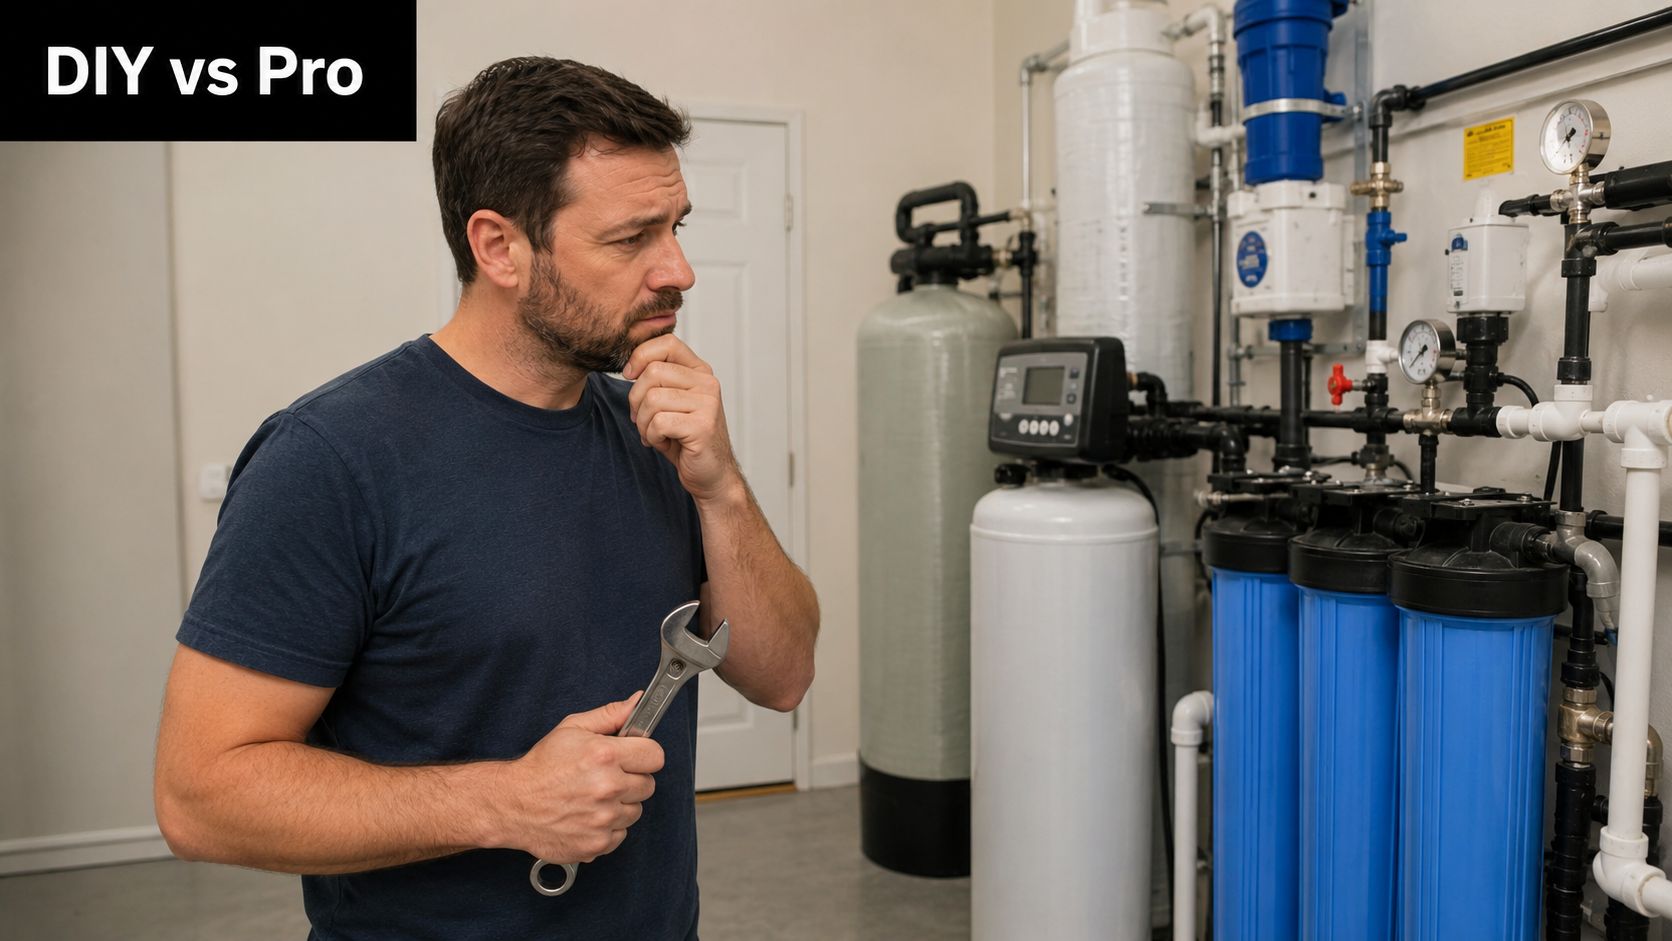
Jobs most homeowners can handle
Routine cartridge replacement is usually a reasonable DIY task if the housing is accessible and the system uses standard canisters. Adding salt to a brine tank, checking for visible leaks, and paying attention to pressure, odor, and taste changes also fit comfortably in the homeowner category.
Those tasks are low-risk when done carefully and on the correct equipment. They also help you catch small issues before they become service calls.
Jobs that need a technician
The CDC advises that any filter removing disinfectants needs regular maintenance to prevent germ growth, and industry guidance commonly recommends professional service every 6 to 12 months, with typical maintenance visits in the $50 to $300 range depending on the system and service frequency according to CDC guidance on home water filters.
That professional line usually starts when the work goes beyond a basic cartridge swap. Call for service when you're dealing with:
- Control valve problems: If a softener or media tank isn't cycling properly, diagnosis matters more than guesswork.
- Persistent leaks: Especially after you've already cleaned and reseated the O-ring.
- Media tank service: Re-bedding or correcting performance issues isn't the same as changing a cartridge.
- Water quality changes with no obvious cause: Testing and local experience are essential.
- Disinfection concerns: Systems that remove chlorine need proper upkeep so the plumbing doesn't become a growth point.
Some of the cheapest service calls are preventive. Some of the most expensive repairs started as a simple DIY job that kept going after the warning signs were obvious.
A local technician also brings one thing homeowners can't easily replicate. Context. In Central Florida, knowing how iron, sulfur, hardness, and sediment typically show up in different areas changes how you troubleshoot. Companies such as Florida Water Management service these systems with that regional water profile in mind, which is useful when symptoms don't fit a simple calendar replacement.
Protecting Your Investment and Your Health
A whole-house system protects more than drinking water. It affects showers, laundry, plumbing fixtures, water heaters, dishwashers, and every tap in the home. Maintenance keeps that protection working the way it should.
The bigger point is health and hygiene. If your system removes disinfectants and then doesn't get maintained, you've created equipment that can stop helping and start causing problems. If cartridges clog, flow drops. If media stops performing, odors and contaminants push through. If housings aren't cleaned, you're leaving residue where clean water should be moving.
The right approach is simple. Follow a realistic schedule. Watch the water itself for changes in pressure, taste, odor, and staining. Handle the basic DIY work correctly. Bring in a pro when the issue moves beyond a straightforward cartridge change.
Homeowners don't need to become water treatment technicians. But they do need a system for paying attention.
Stop guessing what's in your water. Schedule a free, no-obligation water test with Florida Water Management and use the results to build a maintenance plan that matches your Central Florida water.