
You're probably here because the signs have stopped being subtle. The dishes come out spotted. Soap won't lather the way it should. Shower glass clouds over fast. White crust keeps showing up on faucets no matter how often you clean it. In a lot of Central Florida homes, especially ones on private wells, that pattern usually points to one thing. Hard water is moving through the whole house.
A whole-home softener can solve that problem, but only when it's sized correctly, placed correctly, and installed in the right order with any other treatment equipment. That last part matters more in Central Florida than many generic DIY articles admit. A softener can be the right answer for hardness and still be the wrong first piece of equipment for your water.
Table of Contents
- Is Hard Water Winning in Your Florida Home
- Planning Your Installation Before You Cut Any Pipes
- The Core Plumbing and Connection Process
- Special Guidance for Central Florida Well Water
- Commissioning Your System for the First Time
- Long-Term Care and Troubleshooting Common Issues
Is Hard Water Winning in Your Florida Home
In Central Florida, hard water usually shows up in everyday chores before homeowners ever think about plumbing. You see it on plates and glasses first. Then towels start feeling rough. Then the shower door gets that stubborn film that keeps coming back. By the time scale is obvious on fixtures, the water has already been working on everything behind the walls too.
The frustrating part is that many people treat the symptoms one at a time. They buy another cleaner for the shower. They switch detergents. They blame the dishwasher. They replace a faucet aerator. None of that changes the water entering the home.
A properly installed whole-home softener changes the problem at the source. It treats the water before it reaches the water heater, faucets, laundry, and appliances, which is why homeowners often start looking into the broader benefits of a home water softening system once the signs become impossible to ignore.
Hard water problems look cosmetic at first, but the real cost usually shows up in plumbing fixtures, appliance maintenance, and constant cleaning.
Central Florida adds another wrinkle. Some homes are on municipal water, but many properties in Sebring, Avon Park, Frostproof, and surrounding areas depend on private wells. That means two houses on the same road can have very different water chemistry. One home may mainly need softening. The next may also have iron, sulfur odor, sediment, or sanitation concerns.
That's why guessing isn't a smart first move. Before you buy equipment or cut into a water line, get the water tested so you know whether you're dealing with hardness only or a larger treatment problem. If you want clear answers before starting, the safest path is to request a free water test through the company's contact page and base the installation on actual water conditions instead of assumptions.
Planning Your Installation Before You Cut Any Pipes
A lot of Central Florida homeowners get to this stage after one frustrating weekend. They have the softener in the garage, a few fittings on the floor, and a plan they pulled together from a generic video that never mentioned well water, iron staining, or where the pressure tank changes the layout. That is usually where expensive mistakes start.

Start with water testing, not product shopping
Hardness is measured in grains per gallon, or GPG. That number affects softener sizing, regeneration frequency, and salt use. If the hardness number is unknown, the rest of the plan is still guesswork.
It also does not tell the whole story in this part of Florida. On private wells, I often see hardness paired with iron, sulfur odor, sediment, low pH, or bacterial concerns. A softener may address the hardness and still leave the homeowner with staining, smell, or resin fouling if the water was not tested first.
Homeowners comparing systems should understand how whole-home water softening systems are designed to work before choosing equipment. Then match the system to the actual test results, not the box at the store.
Practical rule: Test first. Buy second.
Size the softener to the house
A softener has to match both the water and the household. The usual sizing method is straightforward. Estimate daily water use, multiply it by the hardness in GPG, and use that result to judge how much capacity the system needs between regenerations. The U.S. Department of Energy describes that approach in its guidance on water softener sizing and maintenance.
That gives you a starting point. It does not replace judgment. A two-bath home with light water use can need a different setup than a similar floor plan with a large family, frequent guests, heavy laundry, or irrigation tied into the wrong plumbing branch.
For well-water homes, sizing gets more complicated. Iron can consume softening capacity, and some homes need pretreatment before the softener so the resin bed does not get damaged or clogged. That is one of the main reasons DIY installs go off track here. The unit may be sized for hardness alone when the water chemistry calls for a different sequence of equipment.
A quick planning check helps:
| Household question | Why it matters |
|---|---|
| How many people live in the home | More water use usually means more frequent regeneration |
| What is the tested hardness in GPG | This is the basis for capacity planning |
| Is the home on a private well | Iron, sulfur, sediment, or pH issues may affect system choice |
| Are there high-demand fixtures or business use in the home | Flow rate and reserve capacity matter more |
Pick the location before you buy fittings
The installation site decides whether the job stays manageable. The softener should sit on a level, dry surface near the main water line, a proper drain, and a 120 V outlet. Rheem's DIY water softener installation checklist also notes the incoming pressure range the equipment is designed to handle, which is something worth checking before installation day.
Placement depends on the water source. On city water, the softener usually goes after the main shutoff and before the house branches off to fixtures and the water heater. On a well system, it should be installed after the pressure tank, and the exact order matters if the home also needs filtration, oxidation, or disinfection equipment.
Local experience is key to saving people time and money. In Sebring, Avon Park, Frostproof, and nearby areas, I have seen homeowners place the softener too early, too late, or in a spot with no practical drain connection. I have also seen units installed where Florida heat, flooding risk, or cramped garage layouts made routine service harder than it needed to be.
Before buying fittings, confirm five things: pipe material, pipe size, drain route, power access, and bypass clearance. Then read the manufacturer manual from start to finish. If the house is on a well and the test shows more than hardness, or if the drain, electrical, or plumbing layout is questionable, professional installation from a local company like Florida Water Management is usually the safer call.
The Core Plumbing and Connection Process
The actual plumbing sequence for a water softener has stayed fairly consistent across major brands. Whirlpool's installation guidance describes the core pattern this way: shut off the main water supply, drain the lines, install a bypass valve, connect the unit to the home's plumbing and drain, then complete startup tasks. The same guidance says the softener belongs at the earliest practical point in the plumbing system so it can treat water before it reaches the water heater and the rest of the home, as shown in Whirlpool's installation instructions for homeowners.
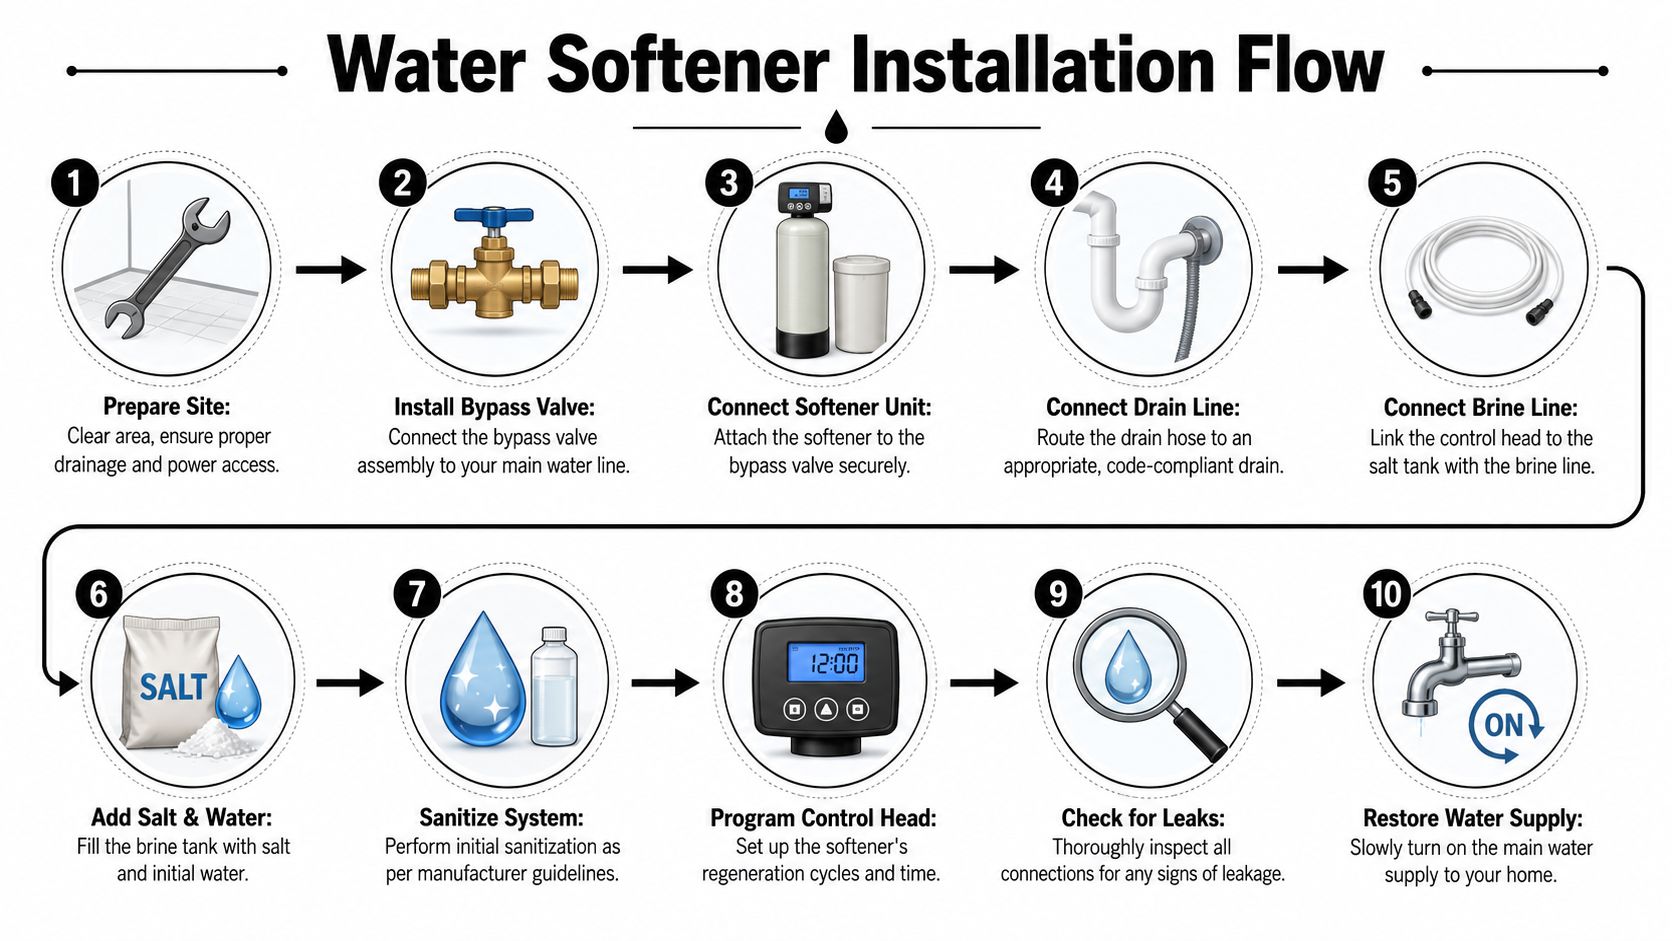
Shut down and drain the house safely
Start by shutting off the main water supply. Then open nearby faucets and drain the lines so you're not cutting into pressurized plumbing. If the home has a water heater in the treatment path, give yourself enough time for pressure and flow to settle before making any cuts.
This isn't the part to rush. A lot of avoidable messes happen because someone assumes a line is empty when it isn't.
A clean prep routine usually looks like this:
- Close the incoming water supply: Make sure the main shutoff holds.
- Relieve pressure at fixtures: Open a sink or hose bib and let the line drain down.
- Clear the work area: You need room for the tank, fittings, drain routing, and future service access.
- Confirm flow direction: Check the softener's inlet and outlet markings before dry-fitting anything.
Install the bypass and tie into the main line
The bypass valve is one of the most important parts of the system. It lets you isolate the softener for service without shutting down water to the entire house. If the unit ever needs maintenance, resin work, or troubleshooting, the bypass saves time and aggravation.
Cut into the main line only after you've measured the softener position and made sure the plumbing has enough clearance for the valve body, connectors, and service space. Dry-fit first. That one habit prevents a lot of crooked installs and alignment stress on the control head.
Use the correct connectors for the plumbing you have. PVC, CPVC, copper, and PEX all behave differently. What works cleanly on one material can create trouble on another if it's forced.
A softener that's hard to service usually wasn't installed with enough space around it.
The inlet and outlet connections need to follow the system's marked water path. Reverse them and the unit won't perform correctly. This is a common DIY mistake because the ports may look interchangeable at a glance.
Run the drain and brine connections correctly
After the main plumbing is in place, connect the drain line and any required overflow tubing. This part is often treated like an afterthought, but poor drain routing creates some of the most annoying callbacks. A kinked drain line, bad slope, loose clamp, or questionable standpipe connection can stop regeneration from working the way it should.
Pay close attention to local code requirements for drain termination. The drain has to discharge safely and appropriately. It can't just be shoved into the nearest opening and forgotten.
The brine tank connection also deserves care. Make sure the brine line is seated properly and protected from sharp bends. If that line leaks air or doesn't seat correctly, the system can struggle during brine draw and regeneration.
A quick field checklist helps here:
| Connection point | What to confirm |
|---|---|
| Main inlet and outlet | Correct orientation and tight seals |
| Bypass valve | Installed accessibly and set for startup procedure |
| Drain line | Secure routing, no kinks, proper termination |
| Brine line | Firm connection, no sharp bends |
| Overflow tube | Routed where accidental overflow can discharge safely |
Once those connections are complete, place the unit in its final position. Don't leave it twisted, crowded against a wall, or jammed into a position that makes salt loading difficult. A good installation isn't just leak-free on day one. It stays serviceable for years.
Special Guidance for Central Florida Well Water
Generic installation advice usually assumes a straightforward house connection. Main line in, drain line out, plug it in, add salt. That's not how many Central Florida well-water jobs go.
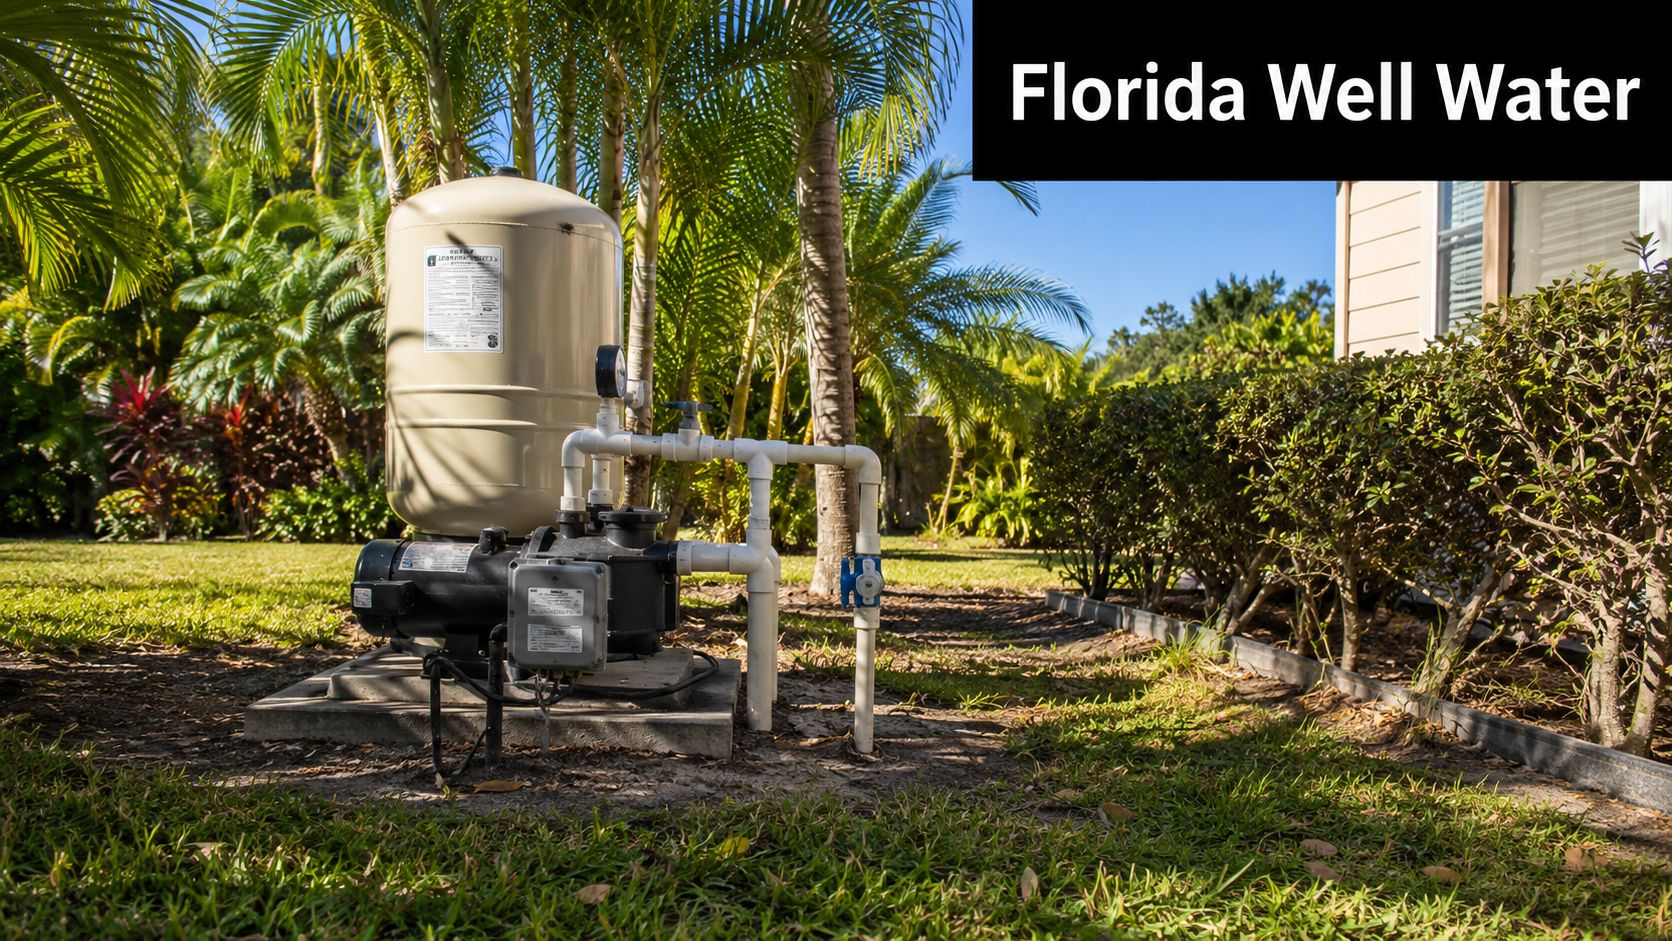
Why well systems need a different plan
Private wells often bring more than hardness. Sediment, iron, sulfur odor, and sanitation concerns can all change what should happen before a softener is installed. Authority guidance summarized in this well-water installation discussion emphasizes that treatment should match specific water chemistry and contamination risks, not be installed as a one-size-fits-all device. That matters because softeners do not remove microbial contamination, and the wrong equipment sequence can reduce performance or leave bigger water problems untreated.
That's why well owners should pay close attention to complete well water treatment options rather than assuming a softener alone will handle every issue.
If a well has visible sediment, that needs to be addressed. If the water smells like rotten eggs, that points to a different treatment need. If iron is present, the sequencing becomes especially important because iron can foul softening resin and shorten the useful life of the system when it's not handled properly.
Get the sequence right
On a well system, the softener is typically not the first thing after the well equipment. Installation guidance places softeners after the pressure tank, but the final order still depends on what the water test shows. That's the part many homeowners miss.
Here's the practical way to view this:
- If sediment is present: protect downstream equipment so grit doesn't load the softener unnecessarily.
- If iron or sulfur is part of the problem: treatment may need to happen ahead of the softener, depending on the chemistry.
- If there are sanitation concerns: a softener is not the fix.
- If the water only has hardness issues: the softener may be the primary whole-home treatment device.
Well-water treatment is a sequence problem as much as an equipment problem.
A professional install becomes the smarter move, not because the pipe connections are impossible, but because diagnosing the water and putting equipment in the right order takes experience. A DIY mistake on municipal water usually means inconvenience. A DIY mistake on a private well can mean poor performance, premature fouling, or untreated water problems that never should have been left in the system.
Commissioning Your System for the First Time
Installation isn't finished when the last fitting is tight. The startup phase decides whether the softener begins life cleanly or starts with hidden problems.
Program the control head with real water data
Use your tested hardness when entering settings on the control valve. Don't guess and don't copy a neighbor's setup. The control head needs accurate information to regenerate properly for your home's conditions.
Add salt to the brine tank according to the manufacturer's startup instructions. Some systems also call for initial water in the brine tank at startup, so check the manual before assuming the tank should remain dry. This is also the point where any manufacturer-recommended sanitizing procedure should be completed.
Programming usually includes these core inputs:
- Time of day: Important for scheduled regeneration timing.
- Hardness setting: Use the actual tested number.
- Regeneration timing: Set it for a practical period when water demand is low.
- Any model-specific options: Follow the manual rather than general internet advice.
Fill slowly and watch everything
Bring the system online gradually. That matters because a fast fill can stir up resin, stress connections, and make leaks harder to catch. Open valves slowly and watch the bypass position carefully as the unit fills.
Earlier setup rules still apply here. The unit should already be on a level, dry surface with proper drain and power access, and incoming pressure should have been confirmed within the manufacturer's acceptable range before installation began, as covered in the earlier site-planning guidance.
Walk the system during the first fill and first cycle. Check every threaded connection, every clamp, and every drain point. Then manually initiate the first regeneration if the manufacturer calls for it. That supervised first run tells you a lot. You'll see whether the control head advances correctly, whether the drain line handles discharge properly, and whether the brine tank is behaving the way it should.
Start a new softener slowly. Fast startups hide small leaks until they become wet floors.
If anything looks off, stop there. A minor leak at startup is easy to fix. Water damage from ignoring it isn't.
Long-Term Care and Troubleshooting Common Issues
A lot of Central Florida homeowners notice trouble only after the signs are back on the fixtures. The soap stops lathering well, the glass shower door hazes over again, or the water heater starts popping from scale. By then, the softener has usually been asking for attention for a while.
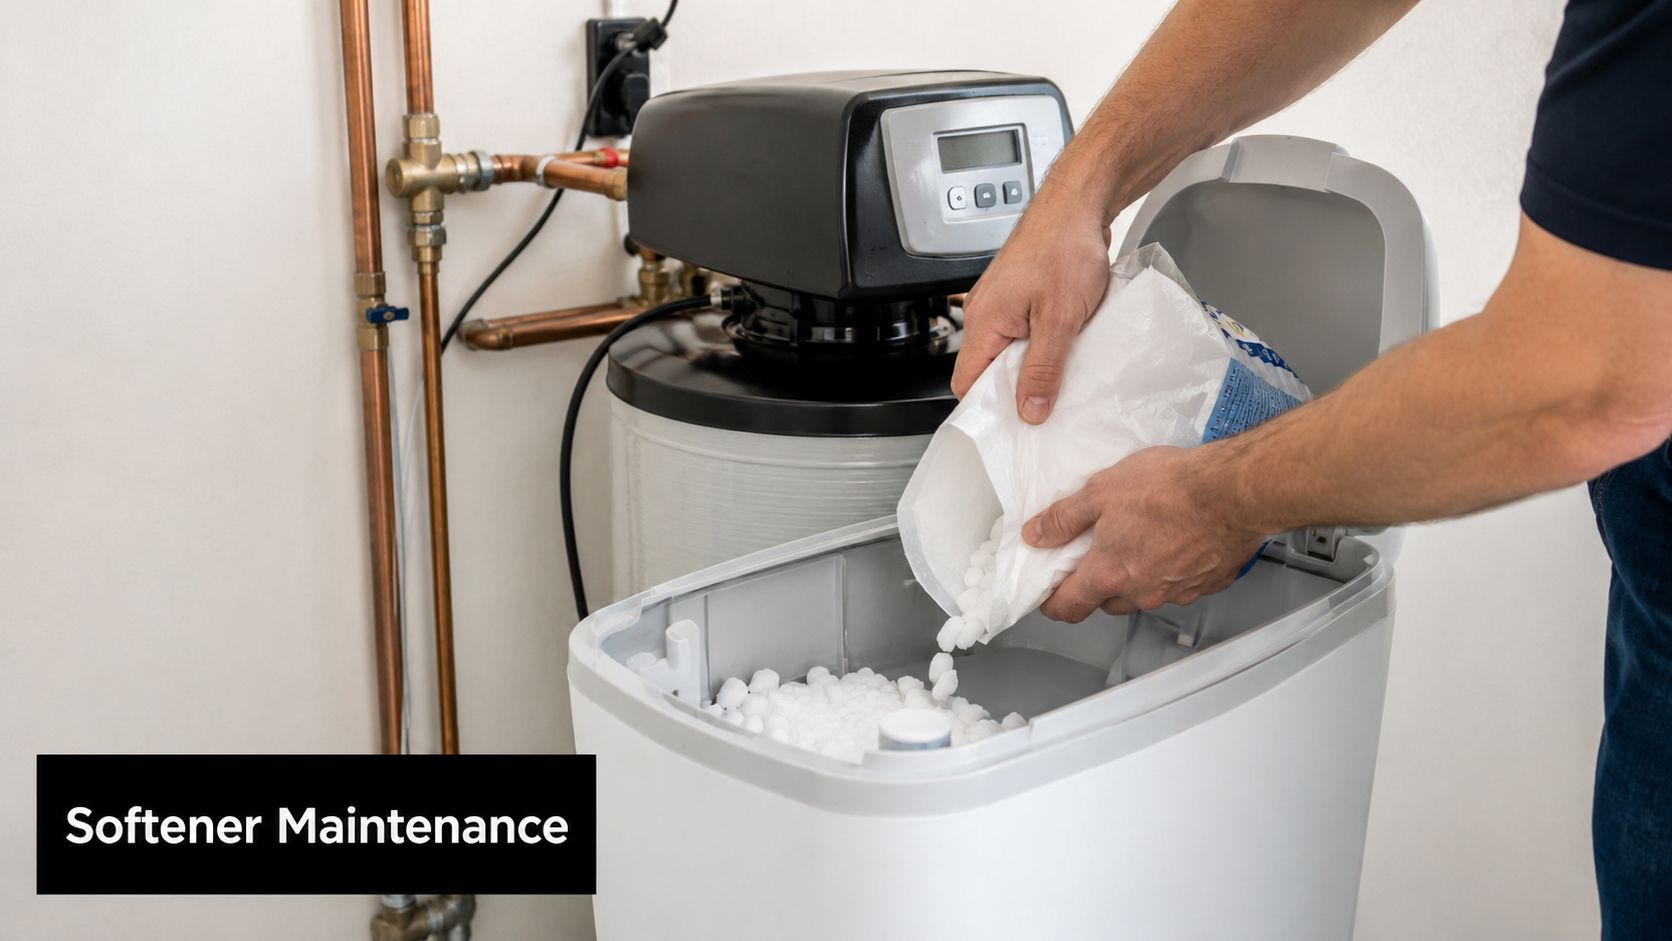
The maintenance habits that keep softeners working
Check the brine tank on a regular schedule instead of waiting for hard water symptoms to return. Salt that gets too low can stop proper regeneration. In Florida, humidity also creates another common problem. Salt can harden into a crust across the top of the tank while the space underneath is empty.
That crust is called a salt bridge, and I see it often in garages and utility rooms that stay warm and damp. If the tank looks like it still has salt but the house suddenly has hard water again, probe the surface gently with a broom handle or similar non-sharp tool. If you hit a hollow spot under the crust, break the bridge carefully. Do not jab at the tank wall or strike the brine tank hard enough to crack it.
A solid care routine usually includes:
- Check salt level regularly: Keep enough salt in the tank for normal regeneration.
- Look for bridging or clumping: A full-looking tank can still fail to make brine.
- Keep the area clean and dry: Moisture around the unit makes service harder and can shorten the life of surrounding materials.
- Watch the drain line during a cycle now and then: Slow discharge, backing up, or constant running needs attention.
- Clean out heavy sludge if your water has iron or sediment: This matters even more on private wells.
Homes on private wells need closer observation than city water homes. A softener only handles hardness. If the well also has iron, manganese, sulfur odor, or sediment, those conditions can foul resin, clog injectors, and make a good softener look defective when the underlying problem is untreated raw water upstream.
What to check when performance drops
Start with the simple items that commonly get missed. Confirm the bypass is in the service position. Check that the unit still has salt. Look for a bridge. Review the hardness setting in the controller if someone changed the programming after a power outage or service visit.
Pressure complaints need a little more caution in Central Florida, especially on well systems. A pressure drop may come from a clogged prefilter, a fouled valve, iron buildup, or trouble with the well equipment itself. If the whole house pressure is low, do not assume the softener is the only cause.
Here's a practical troubleshooting table:
| Symptom | Likely first check | When to stop and call for service |
|---|---|---|
| Hard water signs return | Salt level, salt bridge, bypass position, controller setting | If the unit appears to regenerate normally but hardness stays high |
| Water pressure drops | Sediment prefilter, valve position, visible restriction, well pressure behavior | If pressure loss affects every fixture or starts happening after each regeneration |
| Water tastes salty | Extra rinse need after startup, programming error, brine draw problem | If salty water continues after flushing |
| Unit regenerates too often | Hardness setting, occupancy change, leak or running toilet increasing water use | If settings are correct and salt use still seems excessive |
| Rust staining returns | Iron overload, failed pre-treatment, fouled resin | If you are on a well and staining comes back quickly |
Some problems are worth stopping for right away. Water on the floor around the control valve, drain line overflow, repeated error codes, resin beads in household plumbing, or a softener that will not complete a cycle usually means it needs service, not guesswork.
That is especially true on well water. I have seen homeowners replace salt, change settings, and even swap parts when the actual issue was iron fouling, a bad injector cleaning job, or water chemistry the softener was never sized to handle alone. In those cases, trial-and-error costs more than a proper diagnosis.
If you have corrected the obvious items and the system still is not performing, bring in a local professional who works with Florida well water every day. A good service call should look at the softener, the drain setup, the incoming water quality, and any pre-treatment equipment as one system. That is often the safer choice than pushing through a DIY repair that risks leaks, valve damage, or the wrong equipment for the water.